
In this step-by-step guide for beginners, Learn how to create a simple “Hello World” API using Spring Boot. Set up your development environment, create an API endpoint, and run your application in no time.
Context
Spring Boot is a powerful framework that allows you to quickly and easily create standalone, production-ready applications. In this blog post, we will walk you through the process of creating a simple “Hello World” API using Spring Boot.
Step 1: Set up your development environment
To get started, you will need to have Java and an IDE installed on your system. You can download and install the latest version of Java from the official Oracle website. For IDE, you can choose IntelliJ IDEA, Eclipse, or any other IDE of your choice.
Note:
Spring Boot 4.x requires Java 17 as a minimum version. Make sure you are using Java 17 or higher for Spring Boot 4.x projects.
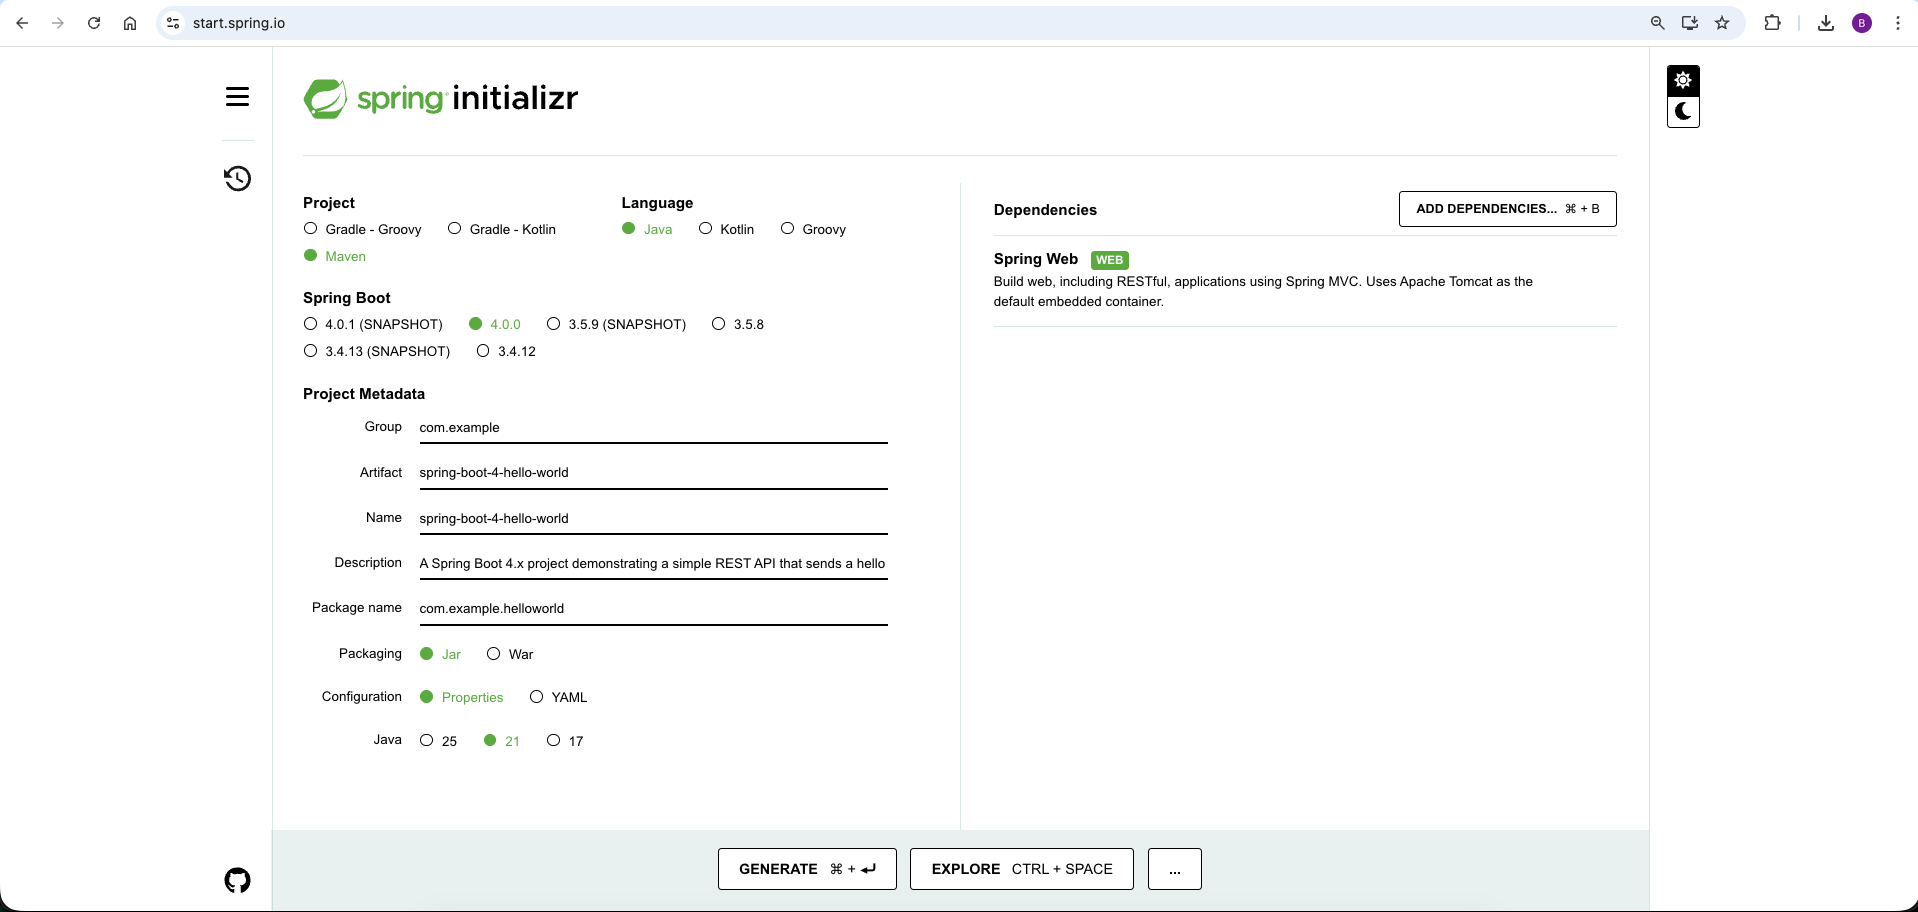
Step 2: Create a new Spring Boot project
Create a new Spring Boot project. You can use the Spring Initializr to generate a new project. Choose the “Spring Web” dependency to include the necessary libraries for building web applications. Import the newly created project inside your IDE.
Step 3: Create a simple API endpoint
Now that you have a new Spring Boot project, it’s time to create a simple API endpoint. Create a new Java class called “HelloWorldController”. This class will contain the code for our API endpoint.
import org.springframework.web.bind.annotation.GetMapping;
import org.springframework.web.bind.annotation.RestController;

@RestController
public class HelloWorldController {

    @GetMapping("/hello")
    public String sendGreetings() {
        return "Hello, World!";
    }
}
This code creates a REST controller that listens for GET requests on the “/hello” endpoint. When a request is received, the controller returns the string “Hello World!”.
Step 4: Run the application
Now that you have created your API endpoint, it’s time to run the application.
Note:
First two commands need to run inside the root folder of the project.
- Using maven
mvn spring-boot:run
- From jar file: Create a jar file using ‘mvn clean install‘ command and then execute
java -jar target/spring-boot-4-hello-world-1.0.0-SNAPSHOT.jar
- Directly from IDE
Right click on SpringBoot4HelloWorldApplication.java and click on 'Run' option
Note:
By default spring boot application starts on port number 8080. If port 8080 is occupied in your system then you can change the port number by adding theserver.portproperty inside theapplication.propertiesfile that is available inside thesrc > main > resourcesfolder.
Source Code
The source code for this example can be found on GitHub.
Spring Boot 4.x Example: click here
Spring Boot 3.x Example: click here
Spring Boot 2.x Example: click here
Conclusion
In conclusion, building a “Hello World” API with Spring Boot is a great starting point for beginners interested in API and web development. With its user-friendly features and powerful capabilities, Spring Boot offers a great framework to build scalable and reliable applications.
Add a Comment