
Learn how to effortlessly generate both normal and executable JARs for your Spring Boot applications. This guide covers Maven configurations and demonstrates the power of packaging your applications for deployment and distribution.
Introduction
Spring Boot has emerged as a game-changer in the world of Java development, simplifying the creation of powerful applications. A key advantage of Spring Boot is its ability to package applications into JAR files for easy deployment and distribution. There are two types of JARs in Spring Boot: normal JARs and executable JARs. The executable JAR is also called Fat JAR or Uber JAR.
In this guide, we will walk you through the process of generating both normal and executable JARs for your Spring Boot applications. By the end of this journey, you will have a firm grasp of packaging your applications effectively.
Understanding JAR Types in Spring Boot
In Spring Boot, there are two types of JARs: normal and executable (fat/uber) JARs. A normal JAR contains only your application’s classes and resources, while an executable JAR includes all dependencies, making it self-contained and runnable independently. Each JAR type serves specific purposes, and you can generate both of them using the Spring Boot Maven plugin.
Use Case for Both JARs
Having both normal and executable JARs can be beneficial in certain situations. For example, you may have a Spring Boot project that serves as a library for other applications. In this case, you can generate a normal JAR to distribute the library and allow other projects to use it as a dependency.
Simultaneously, you may want to provide a demo or showcase version of your application to users or stakeholders. An executable JAR will be useful here, as it includes all dependencies and allows users to run the application independently without worrying about setting up the development environment.
By having both types of JARs, you strike a balance between providing a reusable library and a standalone executable version of your Spring Boot application.
Default Behavior of Spring Boot Maven Plugin
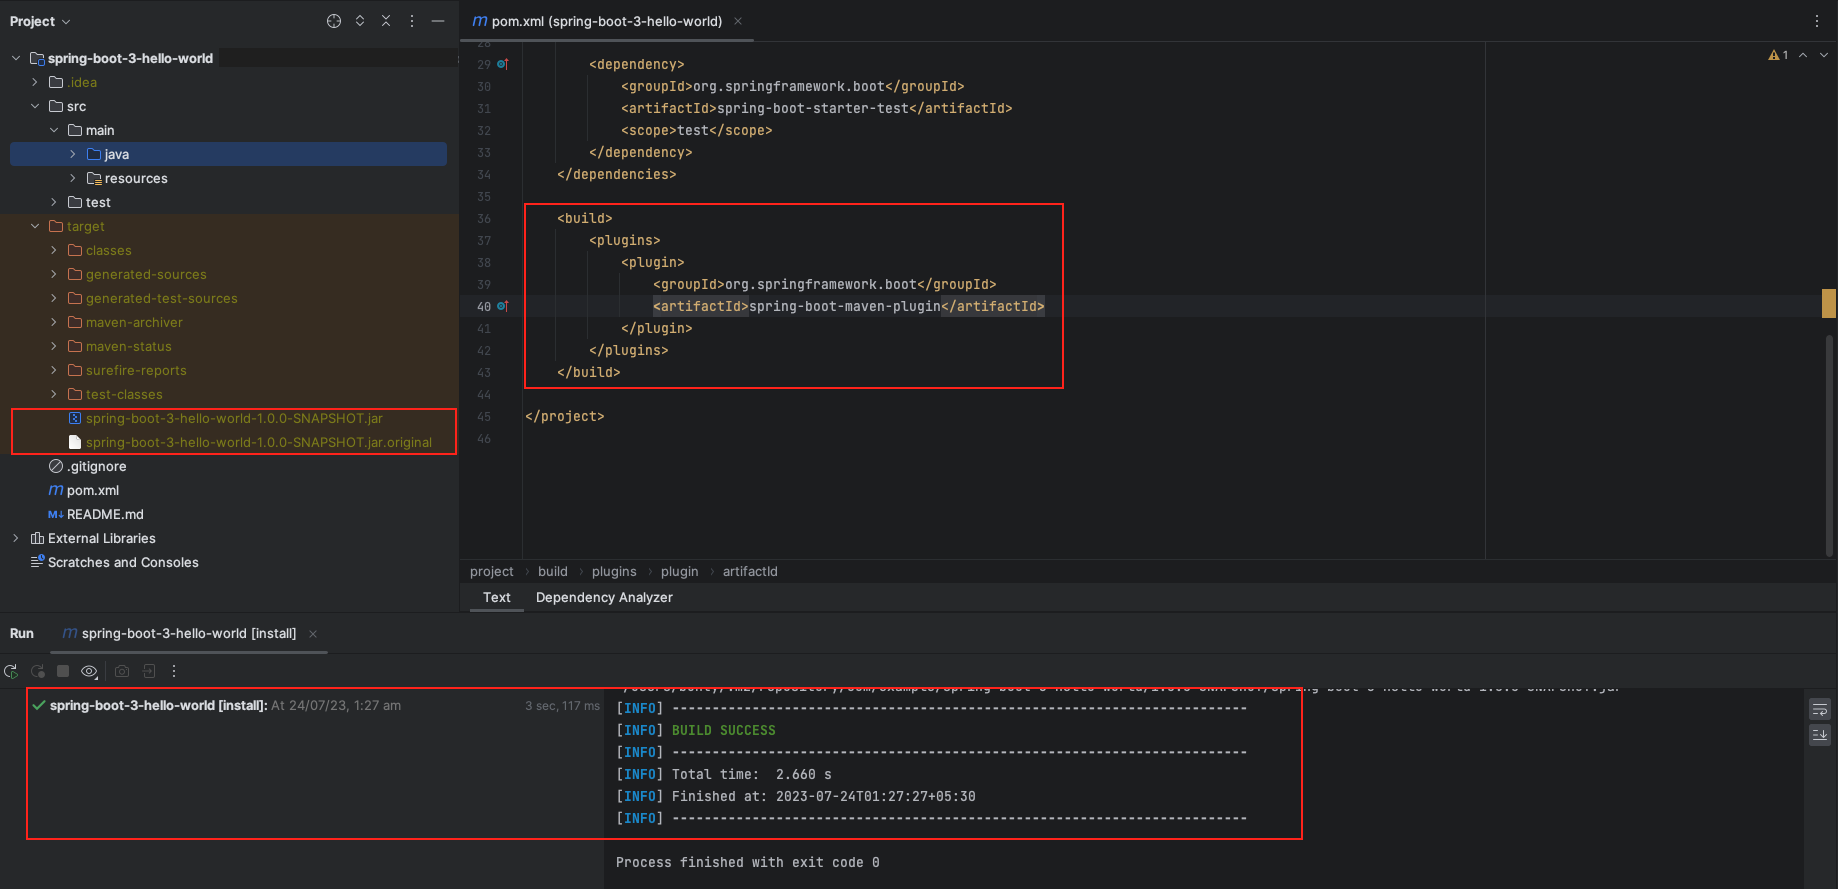
The default behavior of the Spring Boot Maven plugin is to use the “repackage” goal to create an executable JAR. With this default configuration, the plugin generates two JAR files:
artifact-id-version.jar: This is the executable JAR, which includes all the application code and its dependencies in a single, self-contained package. It is the JAR that you can directly run to launch your Spring Boot application.artifact-id-version.original: This is the original JAR that was produced by the Maven build process before it was repackaged into an executable JAR. It contains only the application code and resources without the dependencies. This JAR is kept as a backup, allowing you to reference the original JAR if needed.
The reason for having the artifact-id-version.jar.original is to retain the original JAR produced during the build process. It can be helpful in cases where you may need to troubleshoot or debug the application without the repackaging process.
The main benefit of using the “repackage” goal is that it simplifies the deployment process by packaging everything needed to run the application into a single JAR, making it easy to distribute and run the Spring Boot application on different environments without worrying about classpath issues or external dependencies.
<build>
  <plugins>
    <plugin>
      <groupId>org.springframework.boot</groupId>
      <artifactId>spring-boot-maven-plugin</artifactId>
    </plugin>
  </plugins>
</build>To create a JAR for your Spring Boot application, open your terminal or command prompt, navigate to your project’s root directory, and run the following Maven command:
mvn clean install
Leveraging the “Classifier” Configuration
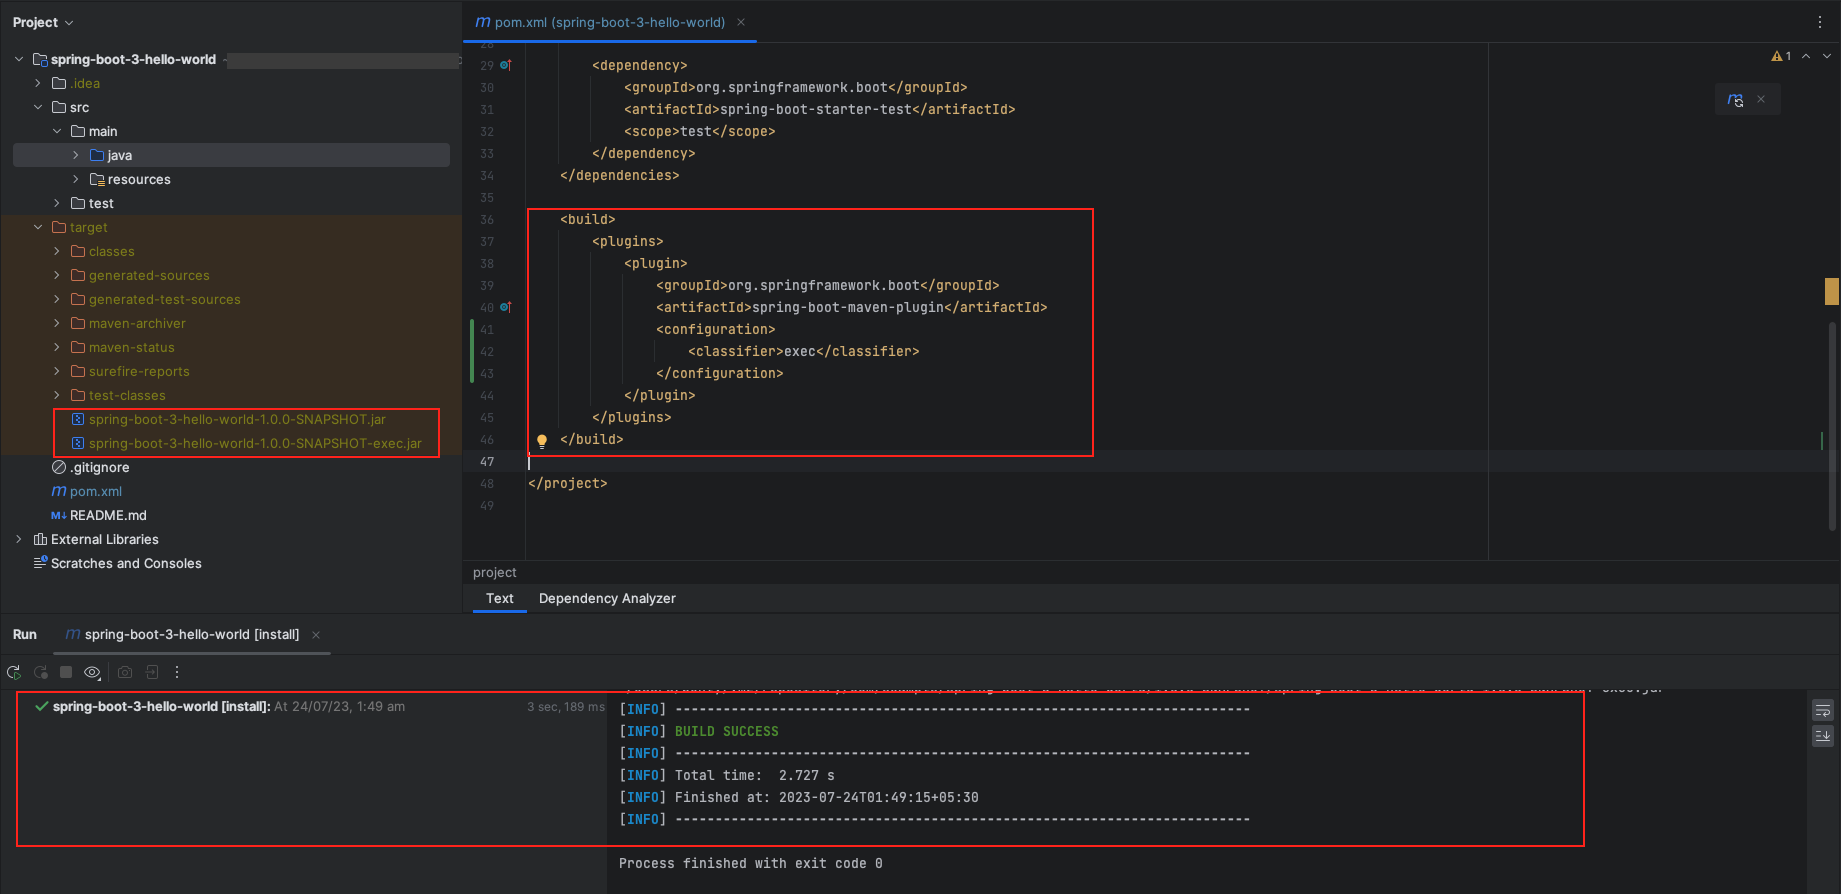
The “classifier” configuration in the Maven plugin provides additional flexibility. By specifying <classifier>exec</classifier>, you instruct Maven to produce an additional JAR alongside the default one. This allows you to have both a normal JAR and an executable JAR, each serving different purposes.
<build>
  <plugins>
    <plugin>
      <groupId>org.springframework.boot</groupId>
      <artifactId>spring-boot-maven-plugin</artifactId>
      <configuration>
        <!-- Classifier value can be anything as per your preference -->
        <classifier>exec</classifier>
      </configuration>
    </plugin>
  </plugins>
</build>Once you have configured the plugin, generating the JARs is as simple as running the same Maven command as before:
mvn clean install
Running the Executable JAR
Running your newly created executable JAR is a breeze. Open your terminal or command prompt, navigate to the directory containing the JAR, and execute the following command:
java -jar your-application-name-exec.jar
Congratulations! Your Spring Boot application is now running independently as a self-contained executable JAR.
FAQs
What is the difference between a normal JAR and an executable JAR in Spring Boot?
A normal JAR contains only application classes and resources, while an executable JAR includes all dependencies to run the application independently.
When should I use a normal JAR over an executable JAR?
Use a normal JAR when you want to share your application as a library for other projects.
What are the benefits of an executable JAR?
An executable JAR allows you to run your Spring Boot application independently without setting up a development environment.
Can I create both normal and executable JARs using Gradle instead of Maven?
Yes, Gradle also supports creating both types of JARs. You can configure the build.gradle file accordingly.
bootRepackage  {
    classifier = 'exec'
}
Things to Consider
When creating normal and executable JARs in Spring Boot, there are several factors to keep in mind to ensure a smooth and efficient development and deployment process. Here are some essential considerations:
- Size and Dependencies: Executable JARs include all project dependencies, making them larger in size compared to normal JARs. Be cautious about the size of your executable JAR, as it can impact deployment and download times. Review your dependencies and exclude any unnecessary ones to optimize the size.
- Use Case and Deployment Strategy: Consider the use case for each type of JAR. If you need to share your application as a library for other projects, a normal JAR is appropriate. On the other hand, an executable JAR is more suitable for independent deployment and showcasing your application’s features.
- Test Rigorously: Test both the normal and executable JARs thoroughly to ensure they work as expected. Pay attention to any differences in behavior between the two types of JARs, especially when handling dependencies and resources.
- Documentation: Clearly document the purpose and usage of each JAR type. Include instructions on how to deploy and execute the executable JAR and how to incorporate the normal JAR as a library in other projects.
- Maintain Consistency: Consistency is crucial for a smooth development workflow. Make sure your project team is aware of the dual JAR generation and follows the same process for packaging.
Conclusion
Understanding how to create both normal and executable JARs in Spring Boot gives you the flexibility to handle different deployment and distribution scenarios. The normal JAR allows you to share your application as a library for other projects, while the executable JAR provides a self-contained, runnable version for demonstrations and independent usage. By leveraging the power of the Spring Boot Maven plugin, you can efficiently package your Spring Boot applications and make the most out of your development journey.
Add a Comment