Dive into Java switch statement basics, syntax, and examples. Explore its evolution across Java versions for a deeper understanding. Start mastering switch statements today!
What is a switch statement?
A switch statement is a way of executing different blocks of code based on the value of a variable or expression. It’s particularly handy when you have multiple choices and want to execute different code based on those choices. It provides an alternative to using multiple if-else statements when you have to make decisions based on a single value. For example, you can use a switch statement to display a different message for each day of the week, based on the value of an integer variable.
How to write a switch statement?
The basic syntax of a switch statement in Java is as follows:
switch (expression) {
  case value1:
    // code block for value1
    break;
  case value2:
    // code block for value2
    break;
  ...
  default:
    // code block for any other value
    break;
}
- The expression is evaluated once and compared with the values of each
case. - If the expression matches a
case, the code inside thatcaseblock is executed. - The
breakstatement is used to exit theswitchblock after executing the relevant code. - The default case in a switch statement executes its code block when no other case matches the expression.
Switch Statement Flowchart
The switch statement flowchart visually represents how a variable’s value is compared to different cases, leading to different code execution paths based on matches or a default path if no matches are found.

Java Switch Statement Example
Here is an example of a switch statement that displays a different message for each day of the week, based on the value of an integer variable named day:
int day = 3; // can be any value from 1 to 7

switch (day) {
  case 1:
    System.out.println("Monday");
    break;
  case 2:
    System.out.println("Tuesday");
    break;
  case 3:
    System.out.println("Wednesday");
    break;
  case 4:
    System.out.println("Thursday");
    break;
  case 5:
    System.out.println("Friday");
    break;
  case 6:
    System.out.println("Saturday");
    break;
  case 7:
    System.out.println("Sunday");
    break;
  default:
    System.out.println("Invalid day");
    break;
}
The output of the above code is:
Wednesday
Importance of Break in Switch Statement
In the switch statement, the break keyword plays an important role in controlling the program’s flow. Its absence can lead to unexpected behavior where all subsequent cases are executed, regardless of whether they match the expression or not.
Example:
public class Main {
    public static void main(String[] args) {
        int expression = 2;

        switch (expression) {
            case 1:
                System.out.println("Case 1");
                break;
            case 2:
                System.out.println("Case 2");
            case 3:
                System.out.println("Case 3");
            default:
                System.out.println("Default case");
        }
    }
}The output of the above code is:
Case 2
Case 3
Default case
Default Case in Switch Statement
In Java switch statements, the default case serves as a fallback option, executing when none of the other case conditions match the provided expression. The default case in a switch statement is optional, but it’s considered good practice to include it for comprehensive handling of unmatched expressions.
Example:
public class Main {
    public static void main(String[] args) {
        int expression = 5;

        switch (expression) {
            case 1:
                System.out.println("Expression value is 1");
                break;
            case 2:
                System.out.println("Expression value is 2");
                break;
            default:
                System.out.println("Expression value is neither 1 nor 2");
        }
    }
}The output of the above code is:
Expression value is neither 1 nor 2
Data Types Supported
In Java, switch statements traditionally supported only integral data types like int, byte, short, and char. However, starting from Java 7, support for the String data type was introduced, greatly enhancing the versatility of switch statements.
Supported Data Types:
- Primitive Types: byte, short, char, int
- Wrapper Classes: Byte, Short, Integer, Long
- Enums: Introduced in Java 5
- String: Introduced in Java 7
Unsupported Data Types:
- boolean
- float
- double
Null Values in Java Switch Statements
In Java’s switch statements, null values are not supported. Attempting to use a null value will result in a NullPointerException being thrown at runtime.
Example:
public class Main {
    public static void main(String[] args) {
        Integer expression = null;

        switch (expression) {
            case 1:
                System.out.println("Expression value is 1");
                break;
            case 2:
                System.out.println("Expression value is 2");
                break;
            default:
                System.out.println("Expression value is neither 1 nor 2");
        }
    }
}The output of the above code is:
Exception in thread "main" java.lang.NullPointerException: Cannot invoke "java.lang.Integer.intValue()" because "expression" is null at com.example.helloworld.Main.main(Main.java:5)
Leveraging Null Case Labels in Java Switch Case
In Java switch statements, null case labels offer a unique way to handle edge cases involving null values. When a switch expression evaluates to null and there is a corresponding null case label, the code associated with that label executes, providing a graceful workaround to prevent NullPointerExceptions.
However, this usage is typically uncommon and can sometimes lead to confusion or unintended behavior. It’s essential to handle null cases appropriately in your switch statement to avoid NullPointerExceptions and ensure your code’s correctness.
Example:
public class Main {
    public static void main(String[] args) {
        Integer expression = null;

        switch (expression) {
            case 1:
                System.out.println("Expression value is 1");
                break;
            case 2:
                System.out.println("Expression value is 2");
                break;
            case null:
                System.out.println("Null value");
                break;
            default:
                System.out.println("Default value");
        }
    }
}The output of the above code is:
Null value
Java Switch Expressions: A Concise and Powerful Way to Branch Logic
Switch expressions in Java offer a more concise and readable approach to handling multi-way branching logic. Unlike traditional switch statements, switch expressions evaluate to a single value and can return values. Let’s delve into the features introduced in switch expressions:
1. Case Labels with Arrow Syntax
Switch expressions introduce a new arrow syntax (->) for case labels, eliminating the need for explicit break statements. This improves code readability and reduces the chances of fall-through errors.
Example:
public class Main {
    public static void main(String[] args) {
        int dayOfWeek = 3;
        String dayName = switch (dayOfWeek) {
            case 1 -> "Monday";
            case 2 -> "Tuesday";
            case 3 -> "Wednesday";
            case 4 -> "Thursday";
            case 5 -> "Friday";
            case 6 -> "Saturday";
            case 7 -> "Sunday";
            default -> "Invalid day"; // Handles unexpected input
        };

        System.out.println("Today is " + dayName);
    }
}The output of the above code is:
Today is Wednesday2. Yield Keyword
The yield keyword is used to return a value from a switch expression. It enhances readability by explicitly indicating the value to be returned. It replaces the need to store intermediate values in variables.
The yield keyword is only required when you have multi-line statements inside the case blocks.
Example:
public class Main {
    public static void main(String[] args) {
        int expression = 2;
        String result = switch (expression) {
            case 0 -> "zero";
            case 1 -> "one";
            case 2 -> {
                yield "two";
            }
            default -> {
                yield "other";
            }
        };

        System.out.println("Output: " + result);
    }
}The output of the above code is:
Output: two3. Switch Labeled Rules
Switch expressions support switch labeled rules, allowing multiple case labels to be grouped together with an arrow syntax. This simplifies code and avoids fall-through issues.
Example:
public class Main {
    public static void main(String[] args) {
        String vehicle = "Scooter";

        // Determine the type of vehicle
        String vehicleType = switch (vehicle) {
            case "Car", "Motorcycle" -> "Motorized";
            case "Bicycle", "Scooter" -> "Non-Motorized";
            default -> "Unknown";
        };

        System.out.println("Vehicle Type: " + vehicleType);
    }
}The output of the above code is:
Vehicle Type: Non-Motorized4. Exhaustiveness Property
The “exhaustiveness” property of a switch expression refers to the requirement that every possible value of the expression must be accounted for in the switch expression. In other words, all possible cases of the expression must be explicitly handled within the switch expression.
This is different from a switch statement, where it’s not mandatory to cover every possible value of the expression. In a switch statement, if a case for a particular value is not provided, the control flow will “fall through” to the default case or continue to the next case if there is no default case. This can lead to unintended behavior or bugs if certain cases are not handled.
On the other hand, in a switch expression, the compiler enforces exhaustiveness, ensuring that every possible value of the expression is explicitly handled. If a case for a particular value is missing in a switch expression, the compiler will raise a compilation error, indicating that the switch expression is not exhaustive. This helps catch potential bugs at compile time and promotes safer code.
Here’s a simple example to illustrate the difference:
Switch Statement:
public class Main {
    public static void main(String[] args) {
        int num = 3;
        switch (num) {
            case 1:
                System.out.println("One");
                break;
            case 2:
                System.out.println("Two");
                break;
            // No case for 3
            default:
                System.out.println("Other");
        }
    }
}
// Output: OtherSwitch Expression:
public class Main {
    public static void main(String[] args) {
        int num = 3;
        String result = switch (num) {
            case 1 -> "One";
            case 2 -> "Two";
            // No case for 3 - compilation error
        };
    }
}
// Output
// java: the switch expression does not cover all possible input valuesAdding a default case to a switch expression will resolve the issue of non-exhaustiveness.
public class Main {
    public static void main(String[] args) {
        int num = 3;
        String result = switch (num) {
            case 1 -> "One";
            case 2 -> "Two";
            default -> "Default";
        };
        System.out.println("Result: "+result);
    }
}
// Result: Default5. Pattern Matching for Switch
Switch expression pattern matching is a feature introduced in Java 17 as a preview feature and released as a stable version in Java 21. It allows you to use patterns in case labels to match values more flexibly.
a. Type Pattern
Type patterns in Java switch expressions allow selector expressions of any type, providing a concise and flexible way to handle different data types. This feature serves as an alternative to traditional instanceof checks. When using type patterns, you can directly specify the type of the object in the case label, simplifying type checking and enhancing code readability.
public class Main {
    public static void main(String[] args) {
        Object obj = "Hello";
        String result = switch (obj) {
            case Integer i -> "Integer: " + i;
            case String s -> "String: " + s;
            case Double d -> "Double: " + d;
            default -> "Other";
        };
        System.out.println("Result - " + result);
    }
}
// Output: Result - String: Hellob. Guarded Pattern
Guarded patterns provide a concise way to handle multiple conditions in a switch statement, eliminating the need for additional if blocks.
Guard clauses refine the base condition of a case within a switch expression. They are added to the label before the colon (:) or arrow (->) and are separated by the when keyword. The syntax is as follows: case <pattern> when <guard clause>.
public class Main {
    public static void main(String[] args) {
        String text = "Hello";

        String result = switch (text) {
            case String s when s.startsWith("H") -> "Starts with H";
            case String s when s.startsWith("W") -> "Starts with W";
            default -> "Other";
        };
        System.out.println("Result: " + result);
    }
}
// Output
// Result: Starts with HIn this example, the switch statement not only checks the type but also applies additional conditions like whether the String value starts with the letter “H” or “W”.
c. Parenthesized Pattern
Parenthesized patterns allow grouping conditions in the case labels, enhancing code readability and organization. In the following example, we use a parenthesized pattern to group boolean expressions for matching specific conditions.
public class Main {
    public static void main(String[] args) {
        Object value = "How are you?";

        String result = switch (value) {
            // Parenthesized pattern for grouping conditions
            case String s when (s.startsWith("H") || s.startsWith("W")) -> "Starts with H or W";
            case String s when s.endsWith("o") -> "Ends with o";
            default -> "Other";
        };

        System.out.println("Result: " + result); // Output: Result: Starts with H or W
    }
}
// Output
// Result: Starts with H or WThings to Consider
Here are some considerations related to Java switch statements and expressions:
- Break Keyword: Remember to use
breakkeyword within switch statement cases to prevent fall-through behavior and ensure that only the intended case’s code is executed. - Default Case: Always include a
defaultcase to handle unexpected values gracefully. This ensures that your switch statement doesn’t encounter unexpected behavior. - Data Types: Be mindful of the data types used in switch expressions. Ensure compatibility between the expression type and case labels to avoid compilation errors.
- Null Handling: Handle null values appropriately within switch statements to prevent NullPointerExceptions. Utilize null case labels where necessary for explicit handling of null values.
- Exhaustiveness: Ensure that all possible values of the expression are covered by switch cases or handled by a default case. This prevents potential bugs caused by missing cases.
- Complexity: Avoid overly complex switch statements or expressions. If the logic becomes convoluted, consider refactoring into smaller, more manageable units.
- Code Readability: Keep switch statements and expressions readable by using meaningful case labels and concise logic. This enhances code maintainability and understanding.
- Pattern Matching: In Java versions supporting switch expressions, leverage pattern matching for concise and expressive code. Use pattern matching to simplify conditional logic within switch expressions.
FAQs
What is a Java switch statement?
A Java switch statement is a control flow statement used to select one of many code blocks to be executed based on the value of a given expression.
How does a switch statement work?
The expression in a switch statement is evaluated once, and its value is compared with the values of each case. When a match is found, the corresponding code block is executed. Optionally, a default case can be provided to handle unmatched values.
What happens if there is no break in a switch statement?
Without a break statement, control will fall through to subsequent cases, executing their code blocks as well. This behavior can be useful in some cases but should be used cautiously to avoid unintended side effects.
What is a Java switch expression?
A Java switch expression is an enhanced version introduced in Java 12 as a preview feature and made stable in Java 14. It allows switch statements to return a value, making them more versatile and concise.
How do switch expressions differ from switch statements?
Switch expressions allow for a more concise syntax and the ability to return a value, whereas switch statements are used for traditional control flow without returning a value. Switch expressions also support additional features like pattern matching and arrow syntax.
Can switch expressions handle null values?
Yes, switch expressions can handle null values. However, it’s essential to explicitly handle null cases using null case labels to prevent NullPointerExceptions.
What is the yield keyword in Java switch expressions?
The yield keyword is used in Java switch expressions to specify the value to be returned from the switch expression. It replaces the break statement in traditional switch statements and indicates the value to be returned from the enclosing switch expression.
Conclusion
In conclusion, Java switch statements provide a straightforward way to control program flow based on the value of an expression. With the introduction of switch expressions, developers have gained a more versatile and concise alternative. Whether using traditional switch statements or modern switch expressions, mastering these features is essential for writing efficient and maintainable Java code.
Learn More
Interested in learning more?
Check out our blog on Spring Boot Email: A Comprehensive Guide to Seamless Messaging
Top Picks for Learning Java
Explore the recommended Java books tailored for learners at different levels, from beginners to advanced programmers.
Disclaimer: The products featured or recommended on this site are affiliated. If you purchase these products through the provided links, I may earn a commission at no additional cost to you.

- All Levels Covered: Designed for novice, intermediate, and professional programmers alike
- Accessible Source Code: Source code for all examples and projects are available for download
- Clear Writing Style: Written in the clear, uncompromising style Herb Schildt is famous for

Head First Java: A Brain-Friendly Guide
- Engaging Learning: It uses a fun approach to teach Java and object-oriented programming.
- Comprehensive Content: Covers Java's basics and advanced topics like lambdas and GUIs.
- Interactive Learning: The book's visuals and engaging style make learning Java more enjoyable.
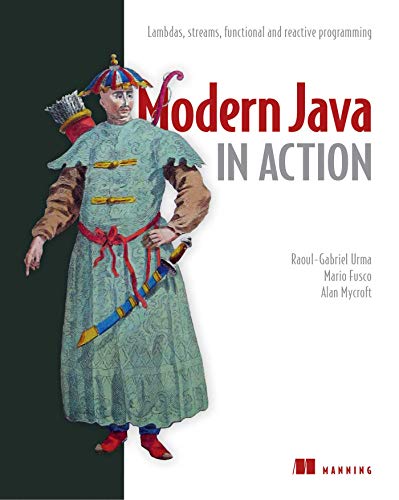
Modern Java in Action: Lambdas, streams, functional and reactive programming
- Latest Java Features: Explores modern Java functionalities from version 8 and beyond, like streams, modules, and concurrency.
- Real-world Applications: Demonstrates how to use these new features practically, enhancing understanding and coding skills.
- Developer-Friendly: Tailored for Java developers already familiar with core Java, making it accessible for advancing their expertise.

- Java Essentials: Learn fundamental Java programming through easy tutorials and practical tips in the latest edition of the For Dummies series.
- Programming Basics: Gain control over program flow, master classes, objects, and methods, and explore functional programming features.
- Updated Coverage: Covers Java 17, the latest long-term support release, including the new 'switch' statement syntax, making it perfect for beginners or those wanting to brush up their skills.
Add a Comment