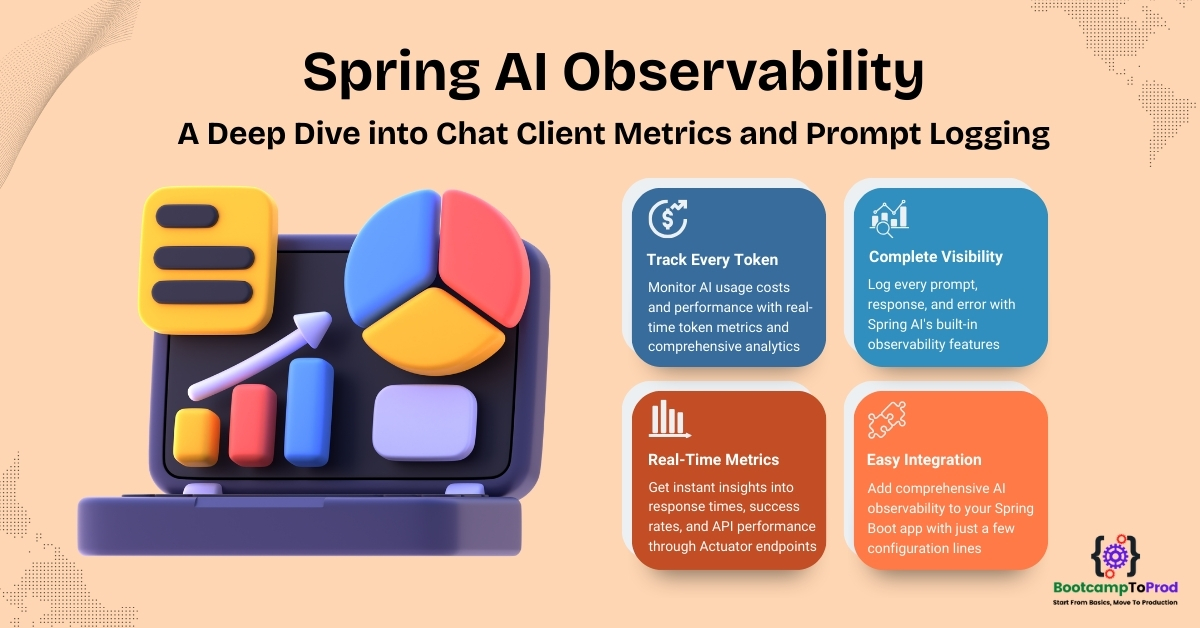
Dive deep into Spring AI observability features! Learn how to enable chat client metrics, including token usage, prompt logging, and ai response logging in your Spring Boot applications.
1. Introduction
Monitoring and observability are pillars of modern software development, and AI-powered applications are no exception. We need to understand the requests we send, the responses we get, how many tokens we’re consuming (which often translates to cost), and how our application performs.
In this guide, we’ll go through the key observability features of Spring AI: Chat Client Metrics, Prompt logging, and Response Logging. We’ll build a simple application and walk through how to enable and interpret these features to gain deep insights into your AI interactions.
2. Understanding Spring AI Observability
Spring AI uses the Micrometer Observability framework to provide comprehensive monitoring capabilities. Here’s what it offers:
- Metrics Collection: Automatic tracking of token usage, response times, and request counts
- Prompt Logging: Detailed logging of user inputs and system prompts
- Response Logging: Complete AI responses for debugging
- Error Tracking: Comprehensive error logging with context
- HTTP Client Metrics: Under-the-hood REST call monitoring
3. What We’re Building: An AI-Powered Customer Support Assistant
To demonstrate Spring AI observability features, we’ll build a Customer Support Assistant that helps users with technical questions and support requests. This bot will handle initial customer queries, answering product questions, and providing basic troubleshooting.
Our goal is to ensure this bot is not a “black box.” We want to log every interaction, track its performance, and monitor resource consumption (like API tokens) to keep an eye on costs and efficiency. Using Spring Actuator we will get information about:
- Token usage for cost monitoring
- Response time metrics for performance analysis
- Prompt logging for debugging and audit trails
- AI response logging for quality assurance
- Error logging for troubleshooting
Our assistant uses OpenRouter as the AI provider, giving us access to a wide range of AI models while still benefiting from Spring AI’s unified observability and integration experience.
We’ve also written a detailed blog on integrating OpenRouter with Spring AI, including how to use free-to-try models and switch between 400+ models with zero code changes — check it out here:
👉 Integrate OpenRouter with Spring AI: Switch Between 400+ AI Models with Zero Code Changes
⚙️ Project Structure & Setup
Below is the folder structure of our Spring Boot application:
spring-ai-chat-client-observability-metrics
├── src
│   └── main
│       ├── java
│       │   └── com
│       │       └──bootcamptoprod
│       │               ├── controller
│       │               │   └── ChatController.java
│       │               ├── service
│       │               │   └── ChatService.java
│       │               ├── dto
│       │               │   └── ChatRequest.java
│       │               │   └── ChatResponse.java
│       │               ├── SpringAiChatClientObservabilityMetricsApplication.java
│       └── resources
│           └── application.yml
└── pom.xml
Explanation:
SpringAiChatClientObservabilityMetricsApplication: The main entry point that starts the Spring Boot application.ChatController.java: Exposes a single REST endpoint,/api/chat/message, to receive user support queries and return AI-generated responses.ChatService.java: Contains the core logic for interacting with theChatClient, sending the user’s topic to the AI model, and returning the explanation.ChatRequest.java&ChatResponse.java: Simple record classes that define the JSON structure for API requests and responses.application.yml: Configures the application, sets up the connection to the AI model provider, and critically, enables the automatic logging and metrics for all AI interactions.pom.xml: Declares the necessary Maven dependencies for Spring Web, the Spring AI OpenAI starter, and Spring Boot Actuator, which exposes the/metricsendpoint.
Let’s set up our project with the necessary dependencies and configurations.
Step 1: Add Maven Dependencies
Add the below dependencies to pom.xml file.
<dependencies>
    <!-- Spring Boot Web for building RESTful web services -->
    <dependency>
        <groupId>org.springframework.boot</groupId>
        <artifactId>spring-boot-starter-web</artifactId>
    </dependency>

    <!-- OpenAI Model Support – configureable for various AI providers (e.g. OpenAI, Google Gemini) -->
    <dependency>
        <groupId>org.springframework.ai</groupId>
        <artifactId>spring-ai-starter-model-openai</artifactId>
    </dependency>

    <!-- Actuator for metrics and monitoring endpoints -->
    <dependency>
        <groupId>org.springframework.boot</groupId>
        <artifactId>spring-boot-starter-actuator</artifactId>
    </dependency>

<dependencyManagement>
    <dependencies>
        <!-- Spring AI bill of materials to align all spring-ai versions -->
        <dependency>
            <groupId>org.springframework.ai</groupId>
            <artifactId>spring-ai-bom</artifactId>
            <version>${spring-ai.version}</version>
            <type>pom</type>
            <scope>import</scope>
        </dependency>
    </dependencies>
</dependencyManagement>
In this configuration:
spring-boot-starter-web:To create our RESTful API endpoint.spring-ai-starter-model-openai:The Spring AI starter for OpenAI-compatible models. We’ll use this to connect to OpenRouter, a service that provides access to various models.spring-boot-starter-actuator: The key to unlocking metrics and monitoring endpoints.spring-ai-bom:This Spring AI Bill of Materials (BOM), located in the<dependencyManagement>section, simplifies our setup. It manages the versions of all Spring AI modules, ensuring they are compatible and preventing potential conflicts with library versions.
Step 2: Configure Application Properties
This is where the magic happens. We configure our AI model, and most importantly, enable our observability features.
spring:
  application:
    name: spring-ai-chat-client-observability-metrics
  ai:
    openai:
      api-key: ${OPENROUTER_API_KEY}
      # This is the crucial part: we override the base URL to point to OpenRouter.
      base-url: https://openrouter.ai/api
      chat:
        options:
          # Here we specify the model from the OpenRouter website.
          model: openrouter/cypher-alpha:free
    chat:
      client:
        observations:
          # Enable prompt logging at ChatClient level
          log-prompt: true
      observations:
        # Enable AI response logging
        log-completion: true
        # Enable error logging for troubleshooting
        include-error-logging: true

# Actuator configuration for metrics endpoints
management:
  endpoints:
    web:
      exposure:
        # Expose all actuator endpoints for monitoring
        include: "*"
📄 Configuration Overview
This application.yml file is the heart of our integration, instructing Spring AI to communicate with OpenRouter instead of the default OpenAI service.
👉 AI (OpenAI Starter) Settings:
- api‑key: Your secret key for authenticating with the AI service. Keep this safe and out of source control.
- base‑url: This is the crucial override. We change the default API endpoint from OpenAI to OpenRouter, redirecting all our AI requests to the OpenRouter gateway.
- model: This property defines which specific model from the vast OpenRouter catalog will process our prompts. Here, we’re using a free model, but you can swap this value to any other model identifier (e.g., anthropic/claude-sonnet-4) to instantly change the AI you’re using.
Make sure to set the OPENROUTER_API_KEY environment variable in your system or IDE for the application to authenticate successfully.
👉 Observation (OpenAI Starter) Settings:
- spring.ai.chat.client.observations & spring.ai.chat.observations: This is the heart of our setup.
log-prompt: true: Tells Spring AI to log the full prompt (including system and user messages) before sending it to the AI model.log-completion: true: Logs the full response received from the AI model.include-error-logging: true: Ensures that if a Spring AI call fails, the error is logged with details.
👉 Actuator Metrics Settings:
- management.endpoints.web.exposure.include: “*”: This exposes all Actuator endpoints over HTTP, including
/actuator/metrics, so we can easily access them. In a production environment, you should secure these endpoints and expose only what’s necessary.
Step 3: Create Data Transfer Objects (DTOs)
These simple Java record classes define the structure of our API’s request and response JSON.
package com.bootcamptoprod.dto;

public record ChatRequest(
        String message  // The user's input message
) {
}
package com.bootcamptoprod.dto;

public record ChatResponse(
        String response // The AI's response message
) {
}
Explanation:
- What they do:
ChatRequestholds the incoming message, andChatResponseholds the outgoing AI reply. - Why they’re needed: They provide a clean, type-safe way to handle JSON data.
- How they fit: The controller uses them to automatically serialize and deserialize the request/response bodies.
Step 4: Create Service Class
The ChatService contains the core logic. It defines the AI’s persona using a system prompt and uses the ChatClient to interact with the AI model.
import com.bootcamptoprod.dto.ChatRequest;
import com.bootcamptoprod.dto.ChatResponse;
import org.springframework.ai.chat.client.ChatClient;
import org.springframework.stereotype.Service;

@Service
public class ChatService {

    private final String SYSTEM_PROMPT = getSystemPrompt();

    private final ChatClient chatClient;

    /**
     * Constructor injection for ChatClient
     * ChatClient.Builder is auto-configured by Spring AI
     */
    public ChatService(ChatClient.Builder chatClientBuilder) {
        this.chatClient = chatClientBuilder.build();
    }

    /**
     * Processes user messages through OpenRouter AI models
     */
    public ChatResponse processMessage(ChatRequest chatRequest) {
        System.out.println("🎯 Processing customer support request");

        try {
            // Send the user's message to the AI model via OpenRouter
            String content = chatClient.prompt()
                    .system(SYSTEM_PROMPT)
                    .user(chatRequest.message())  // Set the user's message
                    .call()                       // Make the API call
                    .content();                   // Extract the response content

            System.out.println("✅ Support response generated with full observability");
            return new ChatResponse(content);

        } catch (Exception e) {
            // Log the error for debugging while providing user-friendly response
            System.err.println("❌ Error processing message: " + e.getMessage());
            return new ChatResponse("I apologize for the technical difficulty. Please try again in a moment.");
        }
    }

    private String getSystemPrompt() {
        return """
                You are a helpful customer support assistant for TechCorp Solutions.

                Your responsibilities:
                - Answer product questions and provide specifications
                - Help troubleshoot technical issues step-by-step
                - Assist with account and billing inquiries
                - Provide clear, concise, and professional responses

                If you cannot resolve an issue completely, guide the customer
                to contact human support with specific next steps.
                """;
    }
}
Explanation:
- AI Interaction: The primary function of this class is to communicate with the AI model (via OpenRouter) using the injected Spring AI ChatClient. It acts as the business logic layer, abstracting the AI interaction away from the controller.
- ChatClient: This is the central interface in Spring AI for interacting with chat-based LLMs. We get a
ChatClient.Builderinjected into our constructor, which comes pre-configured based on our application.yaml. - Request-Response Logic: The
processMessagemethod uses a fluent API to build and execute the request to the AI. Let’s break down the chain:- .prompt(): This is the starting point for creating a new conversation turn with the AI.
- .system(SYSTEM_PROMPT): This is crucial. A system prompt sets the context and instructions for the AI. In our case, we’re telling it to act as a support assistant. This instruction will be sent with every user request.
- .user(chatRequest.message()): This adds the actual message from the customer to the prompt.
- .call().content(): This is the action trigger.
.call()executes the API request to the AI model and waits for the response, and.content()conveniently extracts the main text from that response.
Step 5: Create Controller
This is a standard Spring REST controller that exposes an endpoint for our customers to send messages to.
import com.bootcamptoprod.dto.ChatRequest;
import com.bootcamptoprod.dto.ChatResponse;
import com.bootcamptoprod.service.ChatService;
import org.springframework.http.ResponseEntity;
import org.springframework.web.bind.annotation.PostMapping;
import org.springframework.web.bind.annotation.RequestBody;
import org.springframework.web.bind.annotation.RequestMapping;
import org.springframework.web.bind.annotation.RestController;

@RestController
@RequestMapping("/api/chat")
public class ChatController {

    private final ChatService chatService;

    public ChatController(ChatService chatService) {
        this.chatService = chatService;
    }

    /**
     * Handle customer support chat requests
     * Each request triggers complete observability pipeline
     */
    @PostMapping("/message")
    public ResponseEntity<ChatResponse> sendMessage(@RequestBody ChatRequest chatRequest) {
        System.out.println("📞 Incoming customer support request");

        // Process the message through our service
        ChatResponse chatResponse = chatService.processMessage(chatRequest);

        System.out.println("📋 Support response delivered");
        return ResponseEntity.ok(chatResponse);
    }
}Explanation:
- Purpose: The
ChatControlleris our application’s “front door” for all web traffic. It is responsible for handling incoming HTTP requests, specifically those asking for a technical explanation, and delegating them to theChatServicefor the actual AI processing. - Its job is to:
- Expose an API Endpoint: It defines a single POST endpoint at
/api/chat/message, which is the public address clients will use to send their technical topics. - Receive User Input: It uses the
@RequestBodyannotation to seamlessly convert the JSON body of the incoming request into aChatRequestobject, efficiently capturing the user’s query. - Delegate to Service: It calls the
chatService.processMessage()method, passing along the user’s request. Once the service returns aChatResponsecontaining the AI-generated explanation, the controller wraps it in aResponseEntitywith a success status (200 OK) and sends it back to the client, completing the request-response cycle.
- Expose an API Endpoint: It defines a single POST endpoint at
Step 6: Application Entry Point
Now, let’s define the main class that boots our Spring Boot app.
package com.bootcamptoprod;

import org.springframework.boot.SpringApplication;
import org.springframework.boot.autoconfigure.SpringBootApplication;

@SpringBootApplication
public class SpringAiChatClientObservabilityMetricsApplication {
    public static void main(String[] args) {
        SpringApplication.run(SpringAiChatClientObservabilityMetricsApplication.class, args);
    }
}
Explanation:
- Main Class to Run the Application:
SpringAiChatClientObservabilityMetricsApplicationis the starting point of our application. When you run this class, Spring Boot initializes all components and starts the embedded server.
4. Visualizing the End-to-End Observability Flow
Before we dive into the logs and metrics, let’s look at a diagram showing what happens every time a user sends a message. This sequence diagram illustrates how the Spring AI observability pipeline intercepts the request to record logs and metrics automatically.

5. Testing the Application
- Run the application: Start the
SpringAiOpenRouterIntegrationApplicationfrom your IDE. - Test with curl: Open a terminal and run the following command:
curl -X POST http://localhost:8080/api/chat/message \
-H "Content-Type: application/json" \
-d '{"message": "I am facing an issue while paying for an order"}'
Expected Result: You should see a JSON response like this:
{
  "response": "I'm sorry to hear you're having payment issues. Let's try to resolve this together:\n\n1. **Check Payment Method:** Make sure your payment information is correct and up to date. Verify the card number, expiration date, and security code.\n\n2. **Available Funds:** Confirm that you have sufficient funds in your account or credit limit available for the transaction.\n\n3. **Internet Connection:** Ensure you have a stable internet connection, as connectivity issues can sometimes cause payment failures.\n\n4. **Browser/App Cache:** Clear your browser cache or app data, then restart your browser or app. Sometimes this can resolve payment processing errors.\n\n5. **Payment Method Type:** If you're using a credit/debit card, ensure it's accepted by the site (Visa, Mastercard, etc.). If using PayPal or another service, verify your account status.\n\nIf these steps don't resolve the issue, please contact human support with the following details:\n\n- Exact error message (if any)\n- Payment method used\n- Browser/app version\n- Order reference number (if applicable)\n\nThey can investigate further and assist with payment processing issues on their end."
}
6. Understanding the Logs
6.1. AI System & User Prompt Logging
With log-prompt: true is enabled, your application console will become a treasure trove of information.
When our controller receives a request like {"message": "I am facing an issue while paying for an order"}, Spring AI logs the exact prompt sent to the model.
2025-07-12T22:06:58.603+05:30  INFO 3618 --- [spring-ai-chat-client-observability-metrics] [nio-8080-exec-1] hatClientPromptContentObservationHandler : Chat Client Prompt Content:
["system":"You are a helpful customer support assistant.

Your responsibilities:
- Answer product questions and provide specifications
- Help troubleshoot technical issues step-by-step
- Assist with account and billing inquiries
- Provide clear, concise, and professional responses

If you cannot resolve an issue completely, guide the customer
to contact human support with specific next steps.
", "user":"I am facing an issue while paying for an order"]
This is incredibly useful for debugging. You can see both the static system prompt and the dynamic user prompt, confirming exactly what the AI is being asked.
6.2. AI Response Logging
When log-completion: true is enabled. After the AI model responds, the completion handler logs the result.
2025-07-12T22:06:58.589+05:30  INFO 3618 --- [spring-ai-chat-client-observability-metrics] [nio-8080-exec-1] .o.ChatModelCompletionObservationHandler : Chat Model Completion:
["I'm sorry to hear you're having payment issues. Let's try to resolve this together:

1. **Check Payment Method:** Make sure your payment information is correct and up to date. Verify the card number, expiration date, and security code.

2. **Available Funds:** Confirm that you have sufficient funds in your account or credit limit available for the transaction.

..."]This log shows the exact content returned by the AI. You can use these logs to review the quality of your bot’s responses and fine-tune your system prompt.
6.3. Error Logging
When include-error-logging: true is enabled, you get a detailed stack trace.
2025-07-12T10:20:22.963+05:30 ERROR 4441 --- [nio-8080-exec-1] o.s.a.m.o.ErrorLoggingObservationHandler : Traced Error:
org.springframework.ai.retry.NonTransientAiException: HTTP 429 - {"error":{"message":"Rate limit exceeded..."}}
    at org.springframework.ai.retry.autoconfigure.SpringAiRetryAutoConfiguration$2.handleError(SpringAiRetryAutoConfiguration.java:109)
...This is far more helpful than a generic error message, as it includes the HTTP status (429) and the exact error message from the provider.
7. Understanding the Metrics
Logging is great for inspection, but metrics are essential for aggregation and monitoring over time. Spring AI, through Micrometer, provides several key metrics.
7.1. HTTP Client Request Metrics
Under the hood, ChatClient makes a REST API call. We can monitor these calls using the standard http.client.requests metric.
curl -s 'localhost:8080/actuator/metrics/http.client.requests'
{
  "name": "http.client.requests",
  "baseUnit": "seconds",
  "measurements": [
    { "statistic": "COUNT", "value": 1.0 },
    { "statistic": "TOTAL_TIME", "value": 6.267615625 },
    { "statistic": "MAX", "value": 0.0 }
  ],
  "availableTags": [
    { "tag": "exception", "values": ["none"] },
    { "tag": "method", "values": ["POST"] },
    { "tag": "error", "values": ["none"] },
    { "tag": "uri", "values": ["/api/v1/chat/completions"] },
    { "tag": "outcome", "values": ["SUCCESS"] },
    { "tag": "client.name", "values": ["openrouter.ai"] },
    { "tag": "status", "values": ["200"] }
  ]
}
This tells us the total number of HTTP calls (COUNT), total time spent, and the maximum time for a single call. The availableTags are powerful for filtering, allowing us to see metrics for specific URIs, outcomes (success / errors), or HTTP statuses.
Here, the error tag is crucial. A value of none indicates a successful interaction.
- To see only successful calls:
curl -s 'http://localhost:8080/actuator/metrics/http.client.requests?tag=error%3Anone' - To see calls that resulted in a specific error:
curl -s 'http://localhost:8080/actuator/metrics/http.client.requests?tag=error%3ANonTransientAiException'
This allows you to create dashboards that track your AI interaction success and error rates in real time.
7.2. AI Chat Client Metrics
Spring AI provides a higher-level metric specifically for Chat Client interactions.
curl -s 'localhost:8080/actuator/metrics/spring.ai.chat.client'
{
  "name": "spring.ai.chat.client",
  "baseUnit": "seconds",
  "measurements": [
    { "statistic": "COUNT", "value": 1.0 },
    { "statistic": "TOTAL_TIME", "value": 6.350868708 },
    { "statistic": "MAX", "value": 0.0 }
  ],
  "availableTags": [
    { "tag": "gen_ai.operation.name", "values": ["framework"] },
    { "tag": "spring.ai.kind", "values": ["chat_client"] },
    { "tag": "error", "values": ["none"] },
    { "tag": "spring.ai.chat.client.stream", "values": ["false"] },
    { "tag": "gen_ai.system", "values": ["spring_ai"] }
  ]
}
This metric provides a high-level view of the Chat Client’s performance. It tells us the total number of AI chat requests made (COUNT), the cumulative time spent processing these requests (TOTAL_TIME), and the maximum duration of the slowest request (MAX). The availableTags are incredibly useful for diagnostics, especially the error tag, which allows us to easily filter and count successful (none) versus failed interactions.
Here, the error tag is crucial. A value of none indicates a successful interaction.
- To see only successful calls:
curl -s 'http://localhost:8080/actuator/metrics/spring.ai.chat.client?tag=error%3Anone' - To see calls that resulted in a specific error:
curl -s 'http://localhost:8080/actuator/metrics/spring.ai.chat.client?tag=error%3ANonTransientAiException'
7.3. Token Usage Metrics
For many AI services, you pay per token. Monitoring token usage is essential for cost management.
curl -s 'localhost:8080/actuator/metrics/gen_ai.client.token.usage'
{
  "name": "gen_ai.client.token.usage",
  "description": "Measures number of input and output tokens used",
  "measurements": [
    { "statistic": "COUNT", "value": 1400.0 }
  ],
  "availableTags": [
    { "tag": "gen_ai.operation.name", "values": ["chat"] },
    { "tag": "gen_ai.response.model", "values": ["openrouter/cypher-alpha:free"] },
    { "tag": "gen_ai.request.model", "values": ["openrouter/cypher-alpha:free"] },
    { "tag": "gen_ai.token.type", "values": ["output", "input", "total"] },
    { "tag": "gen_ai.system", "values": ["openai"] }
  ]
}
This metric gives you a total count of all tokens processed. To make it more useful, you can filter by the gen_ai.token.type tag:
- Get input tokens used:
curl -s 'localhost:8080/actuator/metrics/gen_ai.client.token.usage?tag=gen_ai.token.type%3Ainput' - Get output tokens used:
curl -s 'localhost:8080/actuator/metrics/gen_ai.client.token.usage?tag=gen_ai.token.type%3Aoutput' - Get total tokens used:
curl -s 'localhost:8080/actuator/metrics/gen_ai.client.token.usage?tag=gen_ai.token.type%3Atotal'
By tracking these, you can understand the cost drivers of your application—are your prompts too long (high input tokens), or are the AI’s responses too verbose (high output tokens)?
8. Video Tutorial
If you prefer visual learning, check out our step-by-step video tutorial, which demonstrates how to configure and monitor Spring AI Chat Client metrics and analyze prompt logs in real-time.
📺 Watch on YouTube:
9. Source Code
The complete source code for this “An AI-Powered Customer Support Assistant” example, showcasing how to configure and monitor Spring AI observability features, is available on GitHub. You can clone the repository and run it locally to see the chat client metrics and structured logs in action.
🔗 Spring AI Observability Demo: https://github.com/BootcampToProd/spring-ai-chat-client-observability-metrics
10. Things to Consider
As you implement metrics and logging for your Spring AI application, keep these important points in mind:
- Sensitive Data: Be cautious about logging personal or confidential user information, especially in production environments.
- Log Retention: Implement log rotation and retention policies to manage disk usage and comply with data governance standards.
- Logging Overhead: Excessive logging can degrade performance; strike a balance between insight and system load.
- Metrics Collection: Observability adds instrumentation overhead—ensure it doesn’t slow down critical application paths.
- Resource Usage: Continuously monitor CPU, memory, and thread consumption when observability is enabled.
- Cost Monitoring: Regularly scrape and analyze the
gen_ai.client.token.usage metric. Set up alerts in your monitoring system (like Prometheus/Grafana) to notify you if token consumption exceeds a certain threshold. - Rate Limiting: Handle API limits gracefully and monitor HTTP 429 errors to prevent service disruptions.
- Error Handling: Ensure all failure scenarios (timeouts, invalid responses, rate limits) are gracefully handled with fallback logic.
- Monitoring Alerts: Set up alerts on key metrics like response time, failure count, and token usage to catch issues early.
- Metric Cardinality: Be mindful of tags that can have many unique values (like user IDs), as this can lead to high cardinality and memory pressure in your metrics system.
11. FAQs
Can I enable prompt logging without logging the full AI response?
Yes. You can simply set spring.ai.chat.client.observations.log-prompt: true and either omit or set spring.ai.chat.observations.log-completion: false in your application.yaml.
Does enabling these observability features impact performance?
There is a minor overhead, as the observation handlers need to intercept calls, record timers, and write logs. However, for most applications, this impact is negligible compared to the network latency of the AI API call itself. The benefits of observability far outweigh the minimal performance cost.
Are there any security concerns with logging prompts?
Yes, prompts might contain sensitive user information. Consider implementing log sanitization or masking for sensitive data. Also, secure your actuator endpoints in production environments.
Can I track metrics per user or session?
While Spring AI doesn’t provide per-user metrics out of the box, you can implement custom metrics using Micrometer’s tagging capabilities to track user-specific or session-specific data.
How do I disable logging in production for security reasons?
Set spring.ai.chat.client.observations.log-prompt=false and spring.ai.chat.observations.log-completion=false in your production configuration.
Can I filter metrics by specific tags?
Yes, use URL parameters like ?tag=gen_ai.token.type:input to filter metrics by specific tag values.
12. Conclusion
Observability is a must-have when building smart and reliable AI apps—not just something extra. Spring AI makes it easy by working well with Spring Boot Actuator and Micrometer. With built-in support fot chat client metrics and logging, you can stop guessing what your AI is doing and start tracking it clearly. Turn on these features to better understand and improve your app today!
13. Learn More
Interested in learning more?
Integrate OpenRouter with Spring AI: Switch Between 400+ AI Models with Zero Code Changes
Add a Comment