Exposing a local Spring Boot app to the web has never been easier. In this guide, we’ll equip you with all the necessary information to seamlessly expose your local Spring Boot app over the web using Ngrok.
Introduction
Have you ever wanted to show your Spring Boot web app to a friend or colleague, but they’re not sitting right next to you? Well, fear not! With Ngrok, you can expose your local Spring Boot app to the internet in just a few simple steps.
What is Ngrok?
Ngrok is a powerful tool that allows you to expose a web server running on your local machine to the internet. It is a tool that creates a secure tunnel to your local machine and gives it a public URL. This means anyone with that URL can access your locally hosted web app as if it were live on the internet. It’s incredibly useful for testing and sharing your applications during development.
Use Cases for Ngrok
Ngrok isn’t just a tool for sharing your Spring Boot app with friends. It has a variety of use cases that make it incredibly handy for developers and testers alike. Here are a few scenarios where Ngrok can be useful:
1. Demoing Web Sites Without Deploying: Ngrok allows you to share your local web applications with others without deploying them to a public server. This is perfect for showcasing your work-in-progress to clients, colleagues, or stakeholders.
2. Building Webhook Consumers on Your Dev Machine: When working with webhooks (e.g., receiving data from third-party services), Ngrok lets you test and debug webhook endpoints directly on your local machine. You can simulate incoming requests and ensure your application handles them correctly.
3. Testing Mobile Apps Connected to Your Locally Running Backend: Developing a mobile app that communicates with a backend server? Ngrok can help you test the interaction between your mobile app and the backend server in real time, even if the server is running on your local machine.
4. Stable Addresses for Connected Devices Deployed in the Field: Suppose you have IoT devices or sensors deployed in the field. Ngrok provides a consistent and secure URL for these devices, allowing you to monitor and manage them remotely. The consistent URL feature is available exclusively in the paid plan.
5. Running Personal Cloud Services from Your Home: Want to access your home server or Raspberry Pi from anywhere? Ngrok lets you create a public URL for services running on your local network, such as home automation systems or personal websites.
Prerequisites
Before you begin with Ngrok, make sure you have a working Spring Boot application ready to go. If you haven’t created one yet, you can refer to our blog on creating a Spring Boot “Hello, World!” application, which includes all the necessary information and codebase to get started.
Steps to Exposing a Local Spring Boot App
Step 1: Sign Up on Ngrok
Go to Ngrok’s website and sign up for an account. It’s free!
Step 2: Download Ngrok
Download Ngrok for your operating system (Windows, macOS, or Linux) from here. Once downloaded, unzip the file and you’re good to go.
Step 3: Connect Your Account
To begin, open a terminal window and navigate to the directory where you have extracted Ngrok. Once there, execute the command provided below to establish a connection with your Ngrok account:
./ngrok authtoken YOUR_AUTH_TOKEN
Remember to replace “YOUR_AUTH_TOKEN” with the token you receive after signing up on Ngrok. If you haven’t acquired your token yet, you can obtain it from https://dashboard.ngrok.com/get-started/your-authtoken.
Example:
Step 4: Start Your Spring Boot App
Fire up your Spring Boot application as you normally would. Make sure it’s running smoothly on your local machine.
Step 5: Expose Your App
In the same terminal window that was opened earlier, execute the following command:
./ngrok http PORT
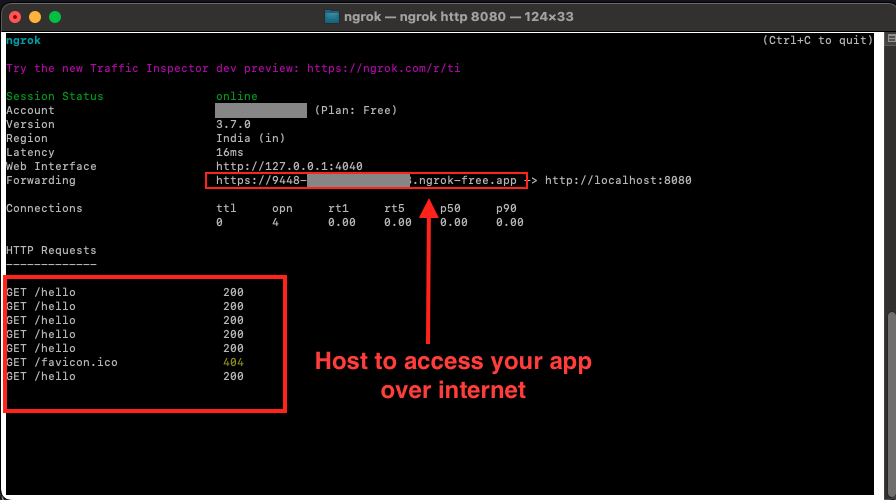
Replace “PORT” with the specific port number where your Spring Boot application is running (for example, 8080). Ngrok will then generate a public URL for you, resembling something like https://randomlettersandnumbers.ngrok-free.app. This URL allows others to access your Spring Boot app over the web/internet, even if it is running on your local system.
Example:
Step 6: Share the URL
That’s it! You now have a public URL that can be shared with anyone who wishes to test or access your Spring Boot app over the internet.
Example:
Step 7: Don’t Forget to Stop Ngrok
Once you’ve finished presenting your app, don’t forget to stop Ngrok by pressing Ctrl + C in the terminal window where Ngrok is running. This will close the tunnel and deactivate the public URL.
Web Interface and Traffic Inspector
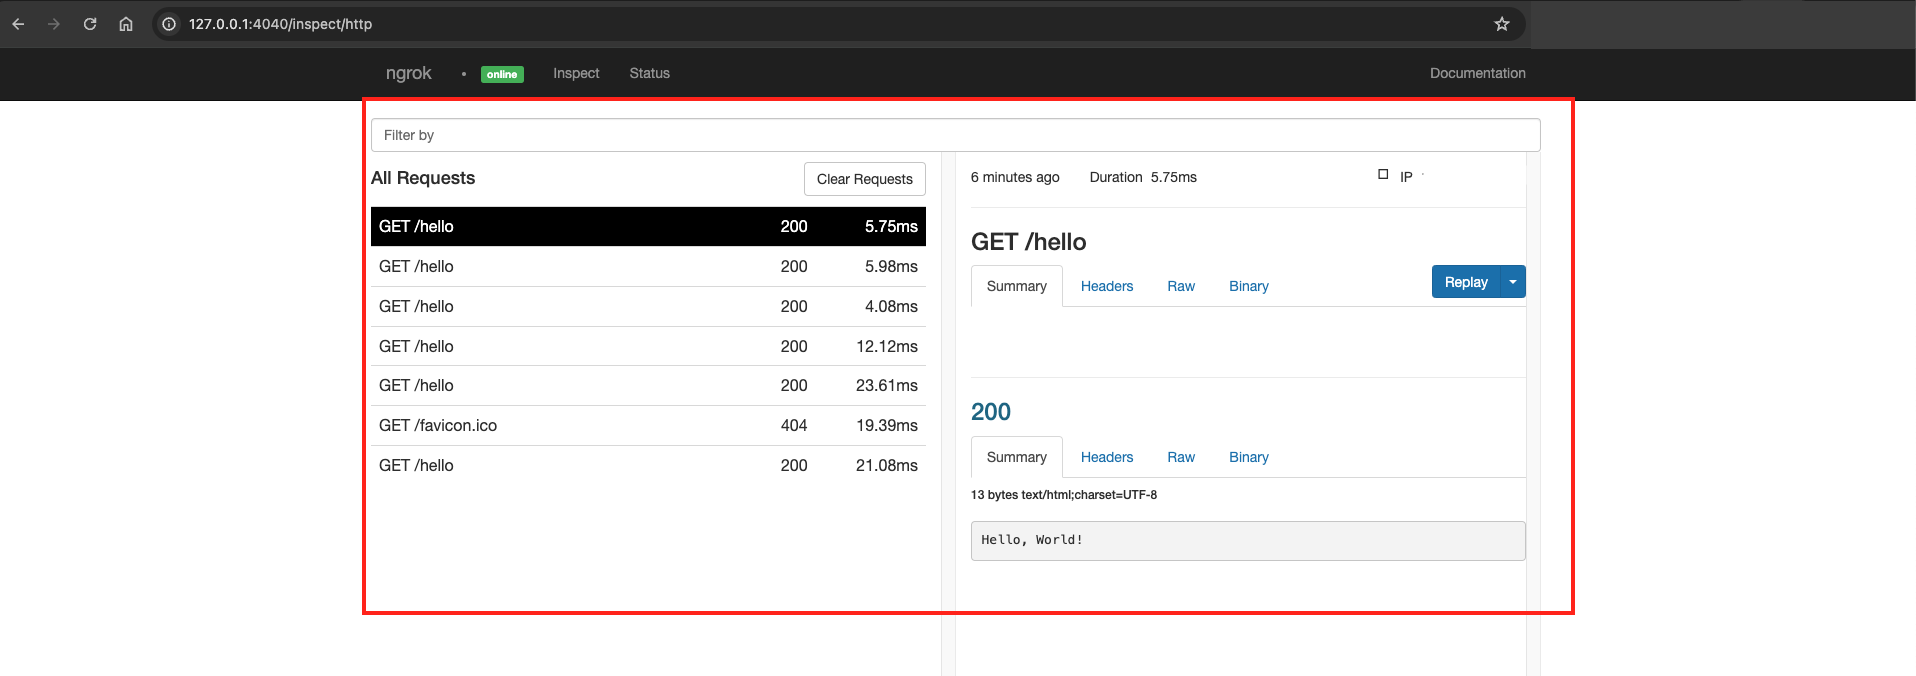
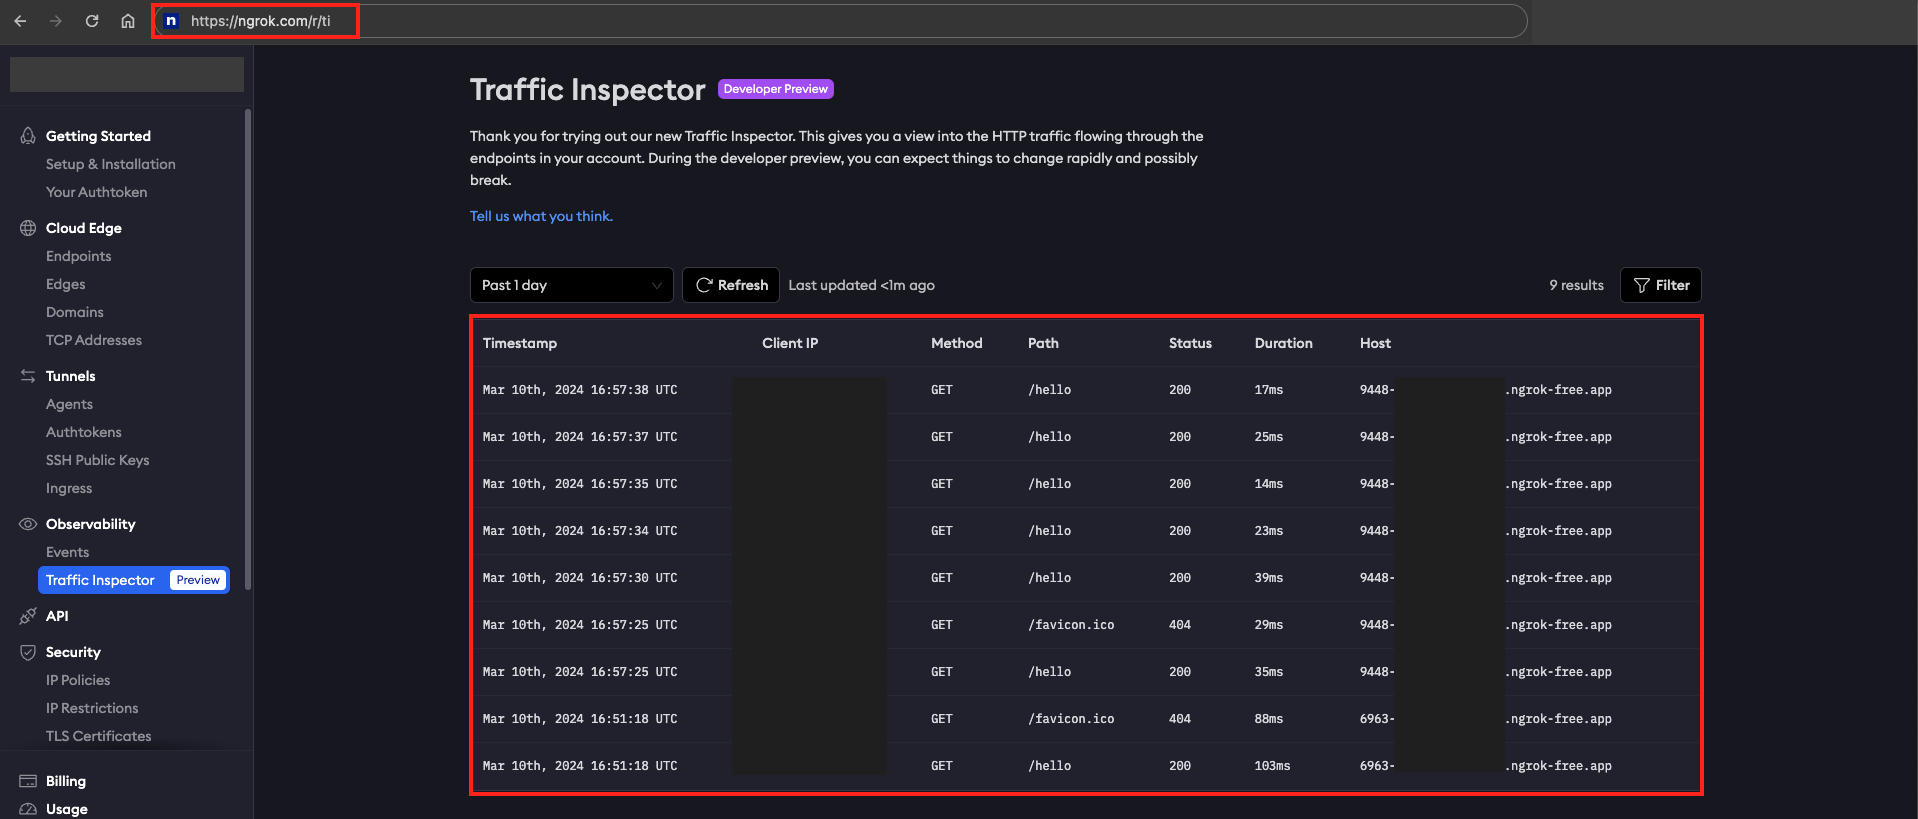
Ngrok’s web interface offers users a convenient platform to monitor their tunnels effortlessly. Through this interface, users gain visibility into active tunnels and can access vital information regarding HTTP traffic. The traffic inspector feature enables users to analyze incoming HTTP requests in real time, providing valuable insights for debugging and troubleshooting.
The web interface can be accessed at http://127.0.0.1:4040 or http://localhost:4040 and the traffic inspector can be accessed at https://ngrok.com/r/ti.
Example:
Things to Consider
Here are some things to consider when using Ngrok:
- Security: While Ngrok provides convenient access to your local development environment, be mindful of security implications, especially when exposing sensitive data or services to the internet. Ensure proper authentication and encryption measures are in place to protect your information.
- Rate Limits: Ngrok offers free and paid plans with different rate limits. Be aware of these limits, especially if you anticipate heavy usage, and consider upgrading to a paid plan if necessary to avoid disruptions in service.
- Session Persistence: Ngrok’s free plan doesn’t guarantee session persistence, meaning the public URL may change after each restart. Evaluate if session persistence is critical for your use case.
- Custom Subdomains: Paid plans of Ngrok offer the ability to use custom subdomains, providing a more branded and stable URL. Evaluate whether this feature aligns with your branding and usability requirements.
- Compliance: Ensure compliance with regulations and policies when exposing your application to the internet. Consider data privacy laws and industry standards applicable to your project.
FAQs
Is Ngrok secure for exposing my local development server?
Ngrok uses secure tunnels, but exercise caution when exposing sensitive data. Consider using HTTPS and implementing additional security measures.
Can I use Ngrok for production environments?
While Ngrok is primarily for development and testing, it offers paid plans suitable for production environments. Evaluate the plan features and consider alternative solutions for long-term usage.
How do I handle Ngrok URL changes?
Ngrok’s free plan may change URLs after each restart. Consider using custom subdomains or upgrading to paid plans for stable URLs.
Can I use Ngrok with other web frameworks besides Spring Boot?
Yes, Ngrok works with various web frameworks and languages, including Node.js, Python, and Ruby on Rails. It’s versatile and compatible with a wide range of technologies.
How does Ngrok handle incoming requests to my local server?
Ngrok establishes a secure tunnel to its servers, and traffic sent to a public URL generated by Ngrok is forwarded through the tunnel to a specific port on your local machine. In other words, when an external request arrives at the public endpoint provided by Ngrok, it is encrypted and relayed to your local server, allowing seamless communication between the internet and your development environment.
Can I customize the Ngrok URL for branding purposes?
Yes, Ngrok offers custom subdomains and domain aliases in its paid plans. This allows you to create branded URLs that align with your project or company.
What happens if my Ngrok session expires?
If your Ngrok session expires, the public URL assigned to your local service will become invalid. To continue using Ngrok, you’ll need to restart the tunnel and obtain a new public URL.
Conclusion
In summary, Ngrok makes it easy to share and test local Spring Boot apps over the internet. With its user-friendly interface and versatile features, developers can collaborate effectively and accelerate their project development workflows.
Learn More
Interested in learning more?
Check out our blog on Java Switch Statement: From Basics to Evolution


Add a Comment