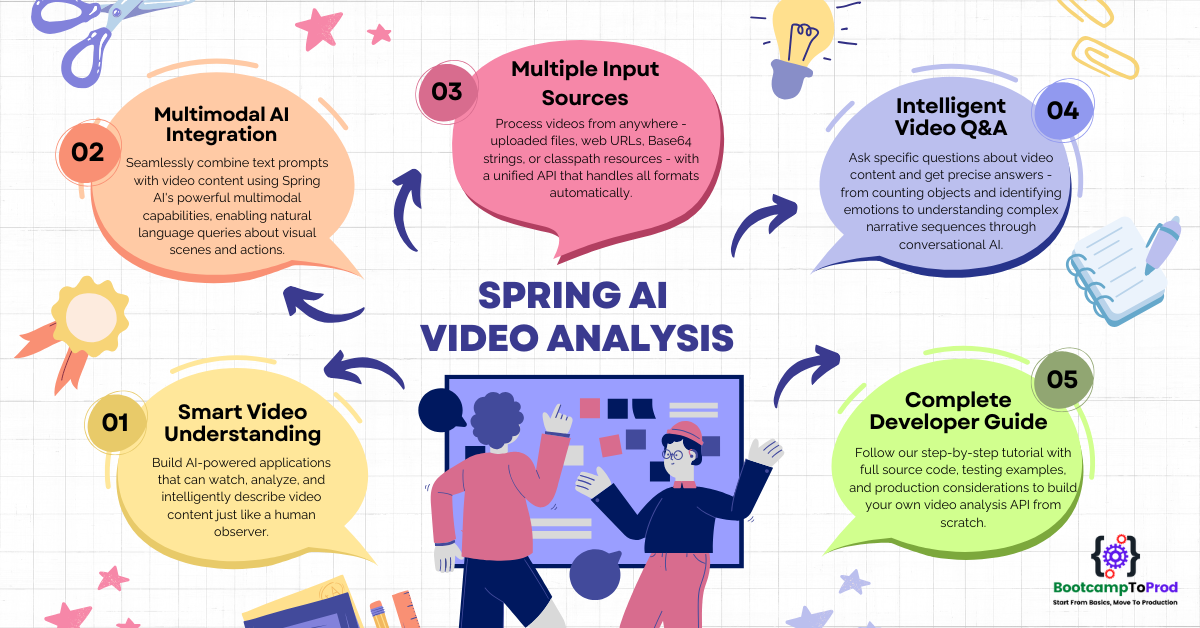
Unlock the power of multimodal AI with our complete guide to Spring AI Video Analysis. Learn step-by-step how to build APIs that can understand, transcribe, and answer questions about video content from files, URLs, or Base64 strings.
1. Introduction
In our journey through Spring AI’s multimodal capabilities, we’ve already explored two powerful use cases:
- Spring AI Image Analysis: Building Powerful Multimodal LLM APIs – Learn how to analyze images
- Spring AI Audio Analysis: A Developer’s Guide to Transcription and Insights – Discover audio processing capabilities
Today, we’re completing the multimodal trilogy with video analysis – the most complex and exciting form of AI-powered content understanding. Video analysis combines visual processing (like images) with temporal understanding (sequence of frames) and often audio components, making it the ultimate test of multimodal AI capabilities.
Imagine building an application that can watch videos and tell you exactly what’s happening in them – like having a smart assistant that can describe scenes, identify objects, transcribe speech, and answer questions about video content. That’s exactly what we’re going to build using Spring AI Video Analysis.
2. Understanding Multimodality: How AI Watches Videos
Humans experience the world through multiple senses at once. We watch a movie by processing moving images and listening to the dialogue simultaneously. Multimodal AI models are designed to do the same. Unlike older AI, which needed separate models for text, images, and audio, models like Gemini can process and reason about different data types—text, images, audio, and video—all in a single prompt.
This means we can ask a question in plain English (text) and provide a video, and the AI will “watch” it to find the answer. It understands the visual content, listens to the audio, and connects it all to your query.
3. What Makes Video Analysis Special?
Unlike static images or standalone audio files, videos present unique challenges:
- Temporal Context: Understanding how scenes change over time
- Visual Storytelling: Identifying narrative elements and scene transitions
- Object Tracking: Following objects as they move through frames
- Audio-Visual Sync: Correlating what you see with what you hear
- Content Summarization: Extracting key moments from lengthy content
4. How Spring AI Video Analysis Works
The process of building our video analysis API is a straightforward request-response cycle, which Spring AI makes incredibly easy to implement.
- Input Collection: The user provides a text prompt (e.g., “Summarize this video”) and a video from one of four sources: a local file upload, a public URL, a Base64-encoded string, or a file from the application’s classpath.
- Prompt Building: Our Spring application takes the text and the video and packages them into a single, unified prompt.
- Spring AI Processing: Spring AI’s ChatClient abstracts away the complexity, handling the communication with the multimodal LLM.
- AI Analysis: The AI model processes the combined prompt, analyzing both the visual frames and the audio track of the video in context with the user’s question.
- Intelligent Response: The AI returns a meaningful, text-based response, such as a summary, a transcription, or an answer to a specific question.

5. The Elegance of Video Processing: Core Implementation
You might think that handling video, with all its complexity, would require a radically different and more complicated approach than handling images or audio. But this is where the power and thoughtful design of Spring AI truly shine. The core implementation pattern remains remarkably consistent and elegant.
The process boils down to the same three essential steps we’ve seen before, just adapted for video:
- Convert any video into a Spring AI Media object – It doesn’t matter if it’s a file upload, a URL to a product demo, a Base64 string from a mobile app, or a sample file from your classpath.
- Create a user prompt combining text and Media – Spring AI’s fluent API handles the heavy lifting of packaging the text instruction and the video data into a single, multimodal request.
- Call the LLM and extract the response – The AI model receives the combined prompt, processes both the visual and audio streams of the video, and returns a single, intelligent answer.
Here’s the core code snippet that powers our entire application. This is the central logic that brings video analysis to life.
// Step 1: Convert your video into a Spring AI Media object.
//
// The Media constructor requires two arguments:
//   1. A MimeType (e.g., MimeType.valueOf("video/mp4") for an MP4 file)
//   2. A Resource, which Spring abstracts beautifully for various sources:
//      – new ClassPathResource("video/sample.mp4") for files in `src/main/resources`
//      – new UrlResource("https://example.com/demo.mov") for videos online
//      – multipartFile.getResource() for videos uploaded by users
//      – new ByteArrayResource(decodedBytes) for video data from a Base64 string
//
// Below is an example loading an MP4 from the application's classpath:
Media videoMedia = new Media(MimeType.valueOf("video/mp4"), new ClassPathResource("video/sample.mp4"));

// Steps 2 & 3: Build the multimodal prompt, call the LLM, and get the response
return chatClient.prompt()
        .user(userSpec -> userSpec
                .text("Summarize the key points of this video.")  // Text-based instruction
                .media(videoMedia))                              // Video input
        .call()
.content();The beauty of consistency:
This abstract pattern is the secret to our application’s flexibility. The code for communicating with the AI does not change based on where the video came from. Once you have a Media object, the rest is identical.
- From a Classpath File:
new Media(mimeType, new ClassPathResource("video.mp4")) - From a User Upload:
new Media(mimeType, multipartFile.getResource()) - From a Web URL:
new Media(mimeType, new UrlResource("https://site.com/video.webm")) - From a Base64 String:
new Media(mimeType, new ByteArrayResource(decodedBytes))`
Whether you’re building a tool to summarize lecture recordings, a system to generate descriptions for user-generated content, or an application to transcribe marketing videos, this core logic remains the same. Spring AI allows you to focus on your business use case, not on the low-level details of handling different video sources.
6. Real-World Application: Building a Video Analysis API
We will now build a flexible and powerful Video Analysis API. A service like this is a cornerstone for countless modern applications and can be used for:
- Content Moderation & Safety: Automatically scanning user-uploaded videos to detect inappropriate or harmful content, ensuring platform safety.
- Media & Entertainment: Generating automatic summaries, highlight reels, and searchable metadata for large video archives, making content more discoverable.
- E-commerce & Marketing: Analyzing product demonstration videos to extract key features, or monitoring social media videos to understand brand perception and customer sentiment.
- Security & Surveillance: Processing security footage to identify specific events, objects, or activities, enabling smarter monitoring systems.
- Education & Training: Creating searchable transcripts and chapter summaries for lecture recordings and instructional videos, enhancing the learning experience.
- Accessibility Services: Automatically generating detailed scene descriptions and captions for video content to make it accessible to visually impaired users.
To ensure our API is a truly versatile “cookbook” example, it will be designed to handle four different video input formats:
- Classpath Resources: Video files that are bundled directly within the application’s resources folder.
- File Uploads: Video files uploaded directly by a user through a standard multipart/form-data request.
- Web URLs: Videos hosted on the internet, accessible via a public URL.
- Base64 Strings: Encoded video data sent directly within a JSON payload, a common pattern for mobile and web applications.
For any of these inputs, the user will also provide a text prompt (a question or instruction, like “Provide video summary”), and our service will return the AI’s intelligent analysis.
⚙️ Project Structure & Setup
Below is the folder structure of our Spring Boot application:
spring-ai-video-analysis-cookbook
├── src
│   └── main
│       ├── java
│       │   └── com
│       │       └── bootcamptoprod
│       │               ├── controller
│       │               │   └── VideoAnalysisController.java
│       │               ├── service
│       │               │   └── VideoAnalysisService.java
│       │               ├── dto
│       │               │   ├── Base64Video.java
│       │               │   ├── Base64VideoAnalysisRequest.java
│       │               │   ├── VideoAnalysisRequest.java
│       │               │   └── VideoAnalysisResponse.java
│       │               ├── exception
│       │               │   └── VideoProcessingException.java
│       │               └── SpringAIVideoAnalysisCookbookApplication.java
│       └── resources
│           ├── application.yml
│           └── video
│               └── sample.mp4
└── pom.xml
Understanding the Project Structure
Here is a quick breakdown of the key files in our project and what each one does:
- VideoAnalysisController.java: Exposes our four REST API endpoints for video analysis.
- VideoAnalysisService.java: Contains the core business logic for processing videos and calling the AI.
- VideoAnalysisRequest.java, Base64Video.java, Base64VideoAnalysisRequest.java, VideoAnalysisResponse.java: Simple record classes (DTOs) that define the JSON structure for our API’s requests and responses.
- VideoProcessingException.java: A custom exception for handling video-related errors gracefully.
- SpringAIVideoAnalysisCookbookApplication.java: The main class that starts the Spring Boot application.
- application.yml: Our configuration file for setting up the AI connection and file upload limits.
- video/*.mp4: Example video files stored in the application’s resources, ready to be used by the
/from-classpathendpoint. - pom.xml: The Maven file where we manage our project’s dependencies.
Let’s set up our project with the necessary dependencies and configurations.
Step 1: Add Maven Dependencies
Every Spring Boot project starts with the pom.xml file. This is where we tell Maven which libraries our project needs to function.
<properties>
    <java.version>21</java.version>
    <spring-ai.version>1.0.1</spring-ai.version>
</properties>

<dependencies>
    <!-- Spring Boot Web for building RESTful web services -->
    <dependency>
        <groupId>org.springframework.boot</groupId>
        <artifactId>spring-boot-starter-web</artifactId>
    </dependency>

    <!-- OpenAI Model Support – configureable for various AI providers (e.g. OpenAI, Google Gemini) -->
    <dependency>
        <groupId>org.springframework.ai</groupId>
        <artifactId>spring-ai-starter-model-openai</artifactId>
    </dependency>

    <!-- For Logging Spring AI calls -->
    <dependency>
        <groupId>org.zalando</groupId>
        <artifactId>logbook-spring-boot-starter</artifactId>
        <version>3.12.2</version>
    </dependency>

<dependencyManagement>
    <dependencies>
        <!-- Spring AI bill of materials to align all spring-ai versions -->
        <dependency>
            <groupId>org.springframework.ai</groupId>
            <artifactId>spring-ai-bom</artifactId>
            <version>${spring-ai.version}</version>
            <type>pom</type>
            <scope>import</scope>
        </dependency>
    </dependencies>
</dependencyManagement>
In this configuration:
spring-boot-starter-web:This is the essential dependency for creating a web application with REST endpoints.spring-ai-starter-model-openai:This is our gateway to the AI. It provides the ChatClient and other tools needed to communicate with any OpenAI-compatible API, which includes Google Gemini.logbook-spring-boot-starter: A fantastic utility for debugging. It will automatically log the details of every HTTP call we make to the Gemini API, which is incredibly helpful for seeing exactly what you’re sending and receiving.spring-ai-bom:This isn’t a direct dependency but a Bill of Materials. It’s a best practice that ensures all the differentspring-ai-*modules you might use will have versions that are tested and work together, preventing conflicts.
Step 2: Configure Application Properties
This file is where we configure the application’s behavior, including how to connect to our AI model and how to handle file uploads.
spring:
  application:
    name: spring-ai-video-analysis-cookbook
  servlet:
    multipart:
      max-file-size: 50MB      # Allow larger video uploads
      max-request-size: 50MB   # Total request size limit

  # AI configurations
  ai:
    openai:
      api-key: ${GEMINI_API_KEY}
      base-url: https://generativelanguage.googleapis.com/v1beta/openai
      chat:
        completions-path: /chat/completions
        options:
          model: gemini-2.0-flash-exp

# (Optional) For detailed request/response logging
logging:
  level:
    org.zalando.logbook.Logbook: TRACE
📄 Configuration Overview
- Multipart Settings: This section is critical for video processing. By default, Spring Boot has a small limit on file uploads. We increase max-file-size and max-request-size to 50MB to allow for reasonable video file uploads.
- API Configuration: We’re using Google’s Gemini through OpenAI-compatible endpoints
- Security: API key is externalized as an environment variable
- Logging: Enables detailed request/response logging for debugging
Step 3: Application Entry Point
This is the main class that bootstraps our entire application.
package com.bootcamptoprod;

import org.springframework.boot.SpringApplication;
import org.springframework.boot.autoconfigure.SpringBootApplication;
import org.springframework.boot.web.client.RestClientCustomizer;
import org.springframework.context.annotation.Bean;
import org.zalando.logbook.Logbook;
import org.zalando.logbook.spring.LogbookClientHttpRequestInterceptor;

@SpringBootApplication
public class SpringAIVideoAnalysisCookbookApplication {

    public static void main(String[] args) {
        SpringApplication.run(SpringAIVideoAnalysisCookbookApplication.class, args);
    }

    /**
     * Configures a RestClientCustomizer bean to integrate Logbook for HTTP logging.
     * This bean adds an interceptor to all outgoing REST client calls made by Spring,
     * allowing us to log the requests sent to the AI model and the responses received.
     */
    @Bean
    public RestClientCustomizer restClientCustomizer(Logbook logbook) {
        return restClientBuilder -> restClientBuilder.requestInterceptor(new LogbookClientHttpRequestInterceptor(logbook));
    }
}
Explanation:
- Main Class to Run the Application:
SpringAIVideoAnalysisCookbookApplicationis the starting point of our application. When you run this class, Spring Boot initializes all components and starts the embedded server. - HTTP Logging: The
RestClientCustomizerbean adds HTTP logging to all REST client calls, helping us debug AI model interactions
Step 4: Create Data Transfer Objects (DTOs)
Before diving into the service logic, let’s understand our data contracts. These simple Java record classes define the structure of the JSON data our API will send and receive.
/**
 * Represents a single video file encoded as a Base64 string, including its MIME type.
 */
public record Base64Video(
        String mimeType,  // e.g., "video/mp4", "video/webm"
        String data       // Base64 encoded video content
) {}

/**
 * Defines the API request body for analyzing one or more Base64 encoded video files.
 */
public record Base64VideoAnalysisRequest(
        List<Base64Video> base64VideoList,  // List of Base64 encoded videos
        String prompt                       // Analysis instruction
) {}

/**
 * Defines the API request body for analyzing video from URLs or a single classpath file.
 */
public record VideoAnalysisRequest(
        List<String> videoUrls,  // List of video URLs (can be null for classpath)
        String prompt,           // User's question about the video(s)
        String fileName          // Filename for classpath videos (can be null for URLs)
) {}

/**
 * Represents the final text response from the AI model after video analysis,
 * which is sent back to the client. This DTO is used for all successful API responses.
 */
public record VideoAnalysisResponse(
        String response  // AI-generated analysis text
) {}
Explanation:
- Base64Video: Represents a single Base64-encoded video with its mimeType and data.
- Base64VideoAnalysisRequest: The request payload for the Base64 endpoint, containing a list of videos and a prompt.
- VideoAnalysisRequest: Defines the request payload for analyzing video files from a list of URLs or a single file from the classpath, along with a text prompt.
- VideoAnalysisResponse: A simple record that wraps the final text analysis (e.g., a transcription or summary) received from the AI model for all API responses.
Step 5: Custom Exception Handling
A custom exception allows us to handle predictable errors in a clean and centralized way.
package com.bootcamptoprod.exception;

import org.springframework.http.HttpStatus;
import org.springframework.web.bind.annotation.ResponseStatus;

/**
 * Custom exception for handling errors during video processing.
 * This will result in an HTTP 400 Bad Request response.
 */
@ResponseStatus(HttpStatus.BAD_REQUEST)
public class VideoProcessingException extends RuntimeException {
    public VideoProcessingException(String message) {
        super(message);
    }

    public VideoProcessingException(String message, Throwable cause) {
        super(message, cause);
    }
}Explanation:
This simple class is a powerful tool for creating clean and predictable REST APIs.
- This class defines a custom, unchecked exception, which allows us to handle predictable errors without cluttering our service-layer methods with throws declarations.
- The crucial element is the
@ResponseStatus(HttpStatus.BAD_REQUEST)annotation. This powerful Spring feature instructs the framework to automatically convert this exception into an HTTP 400 Bad Request response whenever it’s thrown. This makes it perfect for handling client-side problems, such as an invalid video URL, an empty file upload, or a malformed Base64 string. - In our
VideoAnalysisController, we also have a specific@ExceptionHandlerfor this type. This gives us the best of both worlds:@ResponseStatusprovides a sensible default, while our handler allows us to customize the exact JSON response body, ensuring the user gets a clear and helpful error message.
Step 6: The Controller Layer: API Endpoints
The controller is the traffic cop of our application. It listens for incoming HTTP requests at specific URLs and directs them to the correct method in our service layer.
package com.bootcamptoprod.controller;

import com.bootcamptoprod.dto.Base64VideoAnalysisRequest;
import com.bootcamptoprod.dto.VideoAnalysisRequest;
import com.bootcamptoprod.dto.VideoAnalysisResponse;
import com.bootcamptoprod.exception.VideoProcessingException;
import com.bootcamptoprod.service.VideoAnalysisService;
import org.springframework.http.MediaType;
import org.springframework.http.ResponseEntity;
import org.springframework.web.bind.annotation.ExceptionHandler;
import org.springframework.web.bind.annotation.PostMapping;
import org.springframework.web.bind.annotation.RequestBody;
import org.springframework.web.bind.annotation.RequestMapping;
import org.springframework.web.bind.annotation.RequestParam;
import org.springframework.web.bind.annotation.RestController;
import org.springframework.web.multipart.MultipartFile;

import java.util.List;


@RestController
@RequestMapping("/api/v1/video/analysis")
public class VideoAnalysisController {

    private final VideoAnalysisService videoAnalysisService;

    public VideoAnalysisController(VideoAnalysisService videoAnalysisService) {
        this.videoAnalysisService = videoAnalysisService;
    }

    /**
     * SCENARIO 1: Analyze a single video file from the classpath (e.g., src/main/resources/video).
     */
    @PostMapping("/from-classpath")
    public ResponseEntity<VideoAnalysisResponse> analyzeFromClasspath(@RequestBody VideoAnalysisRequest request) {
        VideoAnalysisResponse response = videoAnalysisService.analyzeVideoFromClasspath(request.fileName(), request.prompt());
        return ResponseEntity.ok(response);
    }

    /**
     * SCENARIO 2: Analyze one or more video files uploaded by the user.
     * This endpoint handles multipart/form-data requests.
     */
    @PostMapping(value = "/from-files", consumes = MediaType.MULTIPART_FORM_DATA_VALUE)
    public ResponseEntity<VideoAnalysisResponse> analyzeFromFiles(@RequestParam("videoFiles") List<MultipartFile> videoFiles, @RequestParam("prompt") String prompt) {
        VideoAnalysisResponse response = videoAnalysisService.analyzeVideoFromFile(videoFiles, prompt);
        return ResponseEntity.ok(response);
    }

    /**
     * SCENARIO 3: Analyze one or more video files from a list of URLs.
     */
    @PostMapping("/from-urls")
    public ResponseEntity<VideoAnalysisResponse> analyzeFromUrls(@RequestBody VideoAnalysisRequest request) {
        VideoAnalysisResponse response = videoAnalysisService.analyzeVideoFromUrl(request.videoUrls(), request.prompt());
        return ResponseEntity.ok(response);
    }

    /**
     * SCENARIO 4: Analyze one or more video files from Base64-encoded strings.
     */
    @PostMapping("/from-base64")
    public ResponseEntity<VideoAnalysisResponse> analyzeFromBase64(@RequestBody Base64VideoAnalysisRequest request) {
        VideoAnalysisResponse response = videoAnalysisService.analyzeVideoFromBase64(request.base64VideoList(), request.prompt());
        return ResponseEntity.ok(response);
    }

    /**
     * Centralized exception handler for this controller.
     * Catches our custom exception from the service layer and returns a clean
     * HTTP 400 Bad Request with the error message.
     */
    @ExceptionHandler(VideoProcessingException.class)
    public ResponseEntity<VideoAnalysisResponse> handleVideoProcessingException(VideoProcessingException ex) {
        // You can also create a dedicated error response DTO if you prefer
        return ResponseEntity.badRequest().body(new VideoAnalysisResponse(ex.getMessage()));
    }
}The VideoAnalysisController acts as the entry point for all incoming web requests. It defines the specific URLs (endpoints) for our four different video analysis scenarios and delegates the heavy lifting to the VideoAnalysisService.
Here is a breakdown of its responsibilities:
- /from-classpath: Accepts a JSON request to analyze a single video file located within the application’s resources folder.
- /from-files: Handles multipart/form-data requests, allowing users to upload one or more video files for analysis along with a text prompt.
- /from-urls: Processes a JSON request containing a list of public video URLs, downloading and analyzing each one against the user’s prompt.
- /from-base64: Accepts a JSON payload with a list of Base64-encoded video strings, making it easy to send video data directly in the request body.
- @ExceptionHandler: Acts as a centralized error gateway, catching our custom VideoProcessingException and returning a user-friendly HTTP 400 Bad Request with a clear error message.
Step 7: The Heart of the Application: Service Implementation
This is where the real work happens. The VideoAnalysisService contains the complete business logic. It knows how to convert videos from any source into the format the AI understands and how to talk to the AI.
@Service
public class VideoAnalysisService {

    private static final Logger log = LoggerFactory.getLogger(VideoAnalysisService.class);

    // A single, reusable system prompt that defines the AI's persona and rules for video.
    private static final String SYSTEM_PROMPT_TEMPLATE = getSystemPrompt();

    // A constant to programmatically check if the AI followed our rules.
    private static final String AI_ERROR_RESPONSE = "Error: I can only analyze video and answer related questions.";

    private final ChatClient chatClient;

    // The ChatClient.Builder is injected by Spring, allowing us to build the client.
    public VideoAnalysisService(ChatClient.Builder chatClientBuilder) {
        this.chatClient = chatClientBuilder.build();
    }

    /**
     * System prompt that defines the AI's behavior and boundaries for video tasks.
     */
    private static String getSystemPrompt() {
        return """
                You are an AI assistant that specializes in video analysis.
                Your task is to analyze the provided video file(s) and answer the user's question.
                Common tasks are describing scenes, identifying objects, or summarizing the content.
                If the user's prompt is not related to analyzing the video,
                respond with the exact phrase: 'Error: I can only analyze video and answer related questions.'
                """;
    }
}
Explanation:
- ChatClient: This is the primary tool from Spring AI that serves as our communication bridge to the Large Language Model (LLM). Spring’s dependency injection provides us with a
ChatClient.Builderin the constructor, which we use to build our client instance. - SYSTEM_PROMPT_TEMPLATE: This constant is a powerful “guardrailing” mechanism. A system prompt sets the rules of engagement for the AI before it ever sees the user’s question. We are giving it two critical instructions:
- Its job is to be a “video analysis specialist.”
- It must respond with a precise error phrase if the user asks a question that isn’t about the video. This prevents the AI from going off-topic.
- AI_ERROR_RESPONSE: This isn’t just for reference. We define the exact error phrase as a constant so we can programmatically check the AI’s response. If the AI returns this string, we know the user’s prompt was out of scope, and we can handle it as a client-side error.
Step 7.1: Core Analysis Method: The Multimodal AI Communication Hub
All roads lead to this private method. It doesn’t matter if the video comes from a file, a URL, or a Base64 string—it eventually gets converted and passed to performAnalysis method. This method is the engine room of our service, responsible for the actual conversation with the AI.
/**
 * Core method to communicate with the AI model.
 * It sends the text prompt and a list of video media objects for analysis.
 */
private VideoAnalysisResponse performAnalysis(String prompt, List <Media> mediaList) {

    if (mediaList.isEmpty()) {
        throw new VideoProcessingException("No valid video files were provided for analysis.");
    }

    // This is where the magic happens: combining text and media in one call.
    String response = chatClient.prompt()
        .system(SYSTEM_PROMPT_TEMPLATE)
        .user(userSpec -> userSpec
            .text(prompt)
            .media(mediaList.toArray(new Media[0])))
        .call()
        .content();

    // Check if the AI responded with our predefined error message (a "guardrail").
    if (AI_ERROR_RESPONSE.equalsIgnoreCase(response)) {
        throw new VideoProcessingException("The provided prompt is not related to video analysis.");
    }

    return new VideoAnalysisResponse(response);
}Understanding the multimodal communication flow:
- System Instructions (
.system(SYSTEM_PROMPT_TEMPLATE)): This sets the ground rules and tells the AI what its job is. - User Specification: This is where we build the multimodal prompt. Spring AI’s fluent API lets us combine different types of data seamlessly:
.text(prompt): The user’s question in plain English (e.g., “Summarize this product demo”)..media(mediaList.toArray()): The video file(s) that the AI needs to “Analyze.”
- AI Processing: The chatClient sends the combined request to the LLM, which processes the text and video together to generate a relevant response.
- Response Validation: Our code checks if the AI’s response matches our guardrail error message.
- Structured Return: The final text from the AI is wrapped in our
VideoAnalysisResponseDTO.
The beauty of this design is its simplicity. No matter how the video arrives, it’s always converted into a standard Media object, making our AI communication code clean and uniform.
Step 7.2: Scenario 1: Analyzing Video from the Classpath (Resources Folder)
This use case is ideal for analyzing videos that are packaged with the application, which is great for demos, testing, or using default assets.
public VideoAnalysisResponse analyzeVideoFromClasspath(String fileName, String prompt) {

    validatePrompt(prompt);

    if (!StringUtils.hasText(fileName)) {
        throw new VideoProcessingException("File name cannot be empty.");
    }

    Resource videoResource = new ClassPathResource("video/" + fileName);
    if (!videoResource.exists()) {
        throw new VideoProcessingException("File not found in classpath: video/" + fileName);
    }

    Media videoMedia = new Media(MimeType.valueOf("video/mp4"), videoResource);
    return performAnalysis(prompt, List.of(videoMedia));
}Key Details:
- Validate Input: It first ensures the prompt and fileName are not empty.
- Find Resource: It uses Spring’s
ClassPathResourceto locate the video file within thesrc/main/resources/video/directory of your project. - Check Existence: It calls
.exists()to make sure the file was actually found, throwing an error if not. - Create Media: It wraps the Resource in a Spring AI Media object, specifying its MIME type.
- Perform Analysis: It calls the central
performAnalysismethod, wrapping the single Media object in a List.
Step 7.3: Scenario 2: Analyzing Uploaded Video Files (Multipart)
This is the most common scenario for interactive web applications, allowing users to upload video files directly from their devices.
public VideoAnalysisResponse analyzeVideoFromFile(List <MultipartFile> videos, String prompt) {
    validatePrompt(prompt);

    if (videos == null || videos.isEmpty() || videos.stream().allMatch(MultipartFile::isEmpty)) {
        throw new VideoProcessingException("Video files list cannot be empty.");
    }

    List <Media> mediaList = videos.stream()
        .filter(file -> !file.isEmpty())
        .map(this::convertMultipartFileToMedia)
        .collect(Collectors.toList());

    return performAnalysis(prompt, mediaList);
}

/**
 * Helper to convert a MultipartFile into a Spring AI Media object.
 */
private Media convertMultipartFileToMedia(MultipartFile file) {
    try {
        String contentType = file.getContentType();
        MimeType mimeType = determineVideoMimeType(contentType);
        return new Media(mimeType, file.getResource());
    } catch (Exception e) {
        throw new VideoProcessingException("Failed to process uploaded file: " + file.getOriginalFilename(), e);
    }
}

/**
 * Determines the MimeType from a content type string for various video formats.
 */
private MimeType determineVideoMimeType(String contentType) {
    if (contentType == null) {
        return MimeType.valueOf("video/mp4"); // Default fallback
    }

    return switch (contentType.toLowerCase()) {
    case "video/webm" -> MimeType.valueOf("video/webm");
    case "video/quicktime", "video/mov" -> MimeType.valueOf("video/quicktime");
    case "video/x-ms-wmv", "video/wmv" -> MimeType.valueOf("video/x-ms-wmv"); // WMV
    case "video/x-msvideo", "video/avi" -> MimeType.valueOf("video/x-msvideo"); // AVI
    case "video/x-flv", "video/flv" -> MimeType.valueOf("video/x-flv"); // FLV
    case "video/x-matroska", "video/mkv" -> MimeType.valueOf("video/x-matroska"); // MKV
    case "video/mp2t", "video/mts" -> MimeType.valueOf("video/mp2t"); // MTS
    case "video/x-avchd", "video/avchd" -> MimeType.valueOf("video/mp2t"); // AVCHD (uses same as MTS)
    default -> MimeType.valueOf("video/mp4");
    };
}
Key Details:
- Process List: The method takes a
List<MultipartFile>and uses a Java Stream to process each file efficiently. - Convert Each File to a Media Object: For each valid file, the
convertMultipartFileToMediahelper is called. This method:- Get Content Type: Gets the file’s content type (e.g., “video/mp4”) from the upload metadata.
- Determine MIME Type: Uses our
determineVideoMimeTypeutility to convert this string into a proper MimeType object, handling various formats like MOV, AVI, and MKV. - Create the Media Object: Creates the final Media object, packaging the file’s resource and the verified MimeType.
- Collect and Analyze: The stream gathers all the converted Media objects into a list, which is then sent to the central
performAnalysismethod.
Step 7.4: Scenario 3: Analyzing Video from Web URLs
This scenario is perfect for analyzing videos that are already hosted online, saving the user the step of downloading and re-uploading.
public VideoAnalysisResponse analyzeVideoFromUrl(List <String> videoUrls, String prompt) {
    validatePrompt(prompt);

    if (videoUrls == null || videoUrls.isEmpty()) {
        throw new VideoProcessingException("Video URL list cannot be empty.");
    }

    List <Media> mediaList = videoUrls.stream()
        .map(this::convertUrlToMedia)
        .collect(Collectors.toList());

    return performAnalysis(prompt, mediaList);
}

/**
 * Helper to download a video from a URL and convert it into a Media object.
 */
private Media convertUrlToMedia(String videoUrl) {
    try {
        log.info("Processing video from URL: {}", videoUrl);
        URL url = new URL(videoUrl);
        URLConnection connection = url.openConnection();
        connection.setConnectTimeout(10000);
        connection.setReadTimeout(10000);

        String contentType = connection.getContentType();
        if (contentType == null || !contentType.startsWith("video/")) {
            throw new VideoProcessingException("Invalid or non-video MIME type for URL: " + videoUrl);
        }

        Resource videoResource = new UrlResource(videoUrl);
        return new Media(MimeType.valueOf(contentType), videoResource);
    } catch (Exception e) {
        throw new VideoProcessingException("Failed to download or process video from URL: " + videoUrl, e);
    }
}
Key Details:
- Process URLs: The public method streams the list of URL strings and maps each one to the
convertUrlToMediahelper. - Establish Connection: The
convertUrlToMediahelper creates aURLConnectionto the remote video. Crucially, it sets connection and read timeouts to prevent our application from hanging if the remote server is slow or down. - Get MIME Type: It inspects the
Content-Typeheader from the server’s HTTP response. This is a vital check to ensure the URL actually points to a video file before committing to the full download and analysis. - Create Resource: It uses
UrlResource, a special Spring Resource that represents data at a URL. Spring AI handles the streaming of the data when it’s needed. - Error Handling: The entire operation is wrapped in a
try-catchblock to handle network errors (like 404 Not Found) and convert them into our user-friendlyVideoProcessingException.
Step 7.5: Scenario 4: Analyzing Base64 Encoded Video
This method is useful when video data needs to be sent directly within a JSON payload, a common pattern for single-page web apps or mobile clients.
public VideoAnalysisResponse analyzeVideoFromBase64(List <Base64Video> base64Videos, String prompt) {
    validatePrompt(prompt);

    if (base64Videos == null || base64Videos.isEmpty()) {
        throw new VideoProcessingException("Base64 video list cannot be empty.");
    }

    List <Media> mediaList = base64Videos.stream()
        .map(this::convertBase64ToMedia)
        .collect(Collectors.toList());

    return performAnalysis(prompt, mediaList);
}

/**
 * Helper to decode a Base64 string into a Media object.
 */
private Media convertBase64ToMedia(Base64Video base64Video) {
    if (!StringUtils.hasText(base64Video.mimeType()) || !StringUtils.hasText(base64Video.data())) {
        throw new VideoProcessingException("Base64 video data and MIME type cannot be empty.");
    }
    try {
        byte[] decodedBytes = Base64.getDecoder().decode(base64Video.data());
        Resource resource = new ByteArrayResource(decodedBytes);
        return new Media(MimeType.valueOf(base64Video.mimeType()), resource);
    } catch (Exception e) {
        throw new VideoProcessingException("Invalid Base64 data provided.", e);
    }
}
Key Details:
- Process List: Similar to the other scenarios, this method streams the list of
Base64Videoobjects and maps them to theconvertBase64ToMediahelper. - Decode Data: The core task of the
convertBase64ToMediahelper is to take the long Base64 text string and decode it back into its raw binary form (abyte[]array). - Wrap in Resource:It then uses Spring’s
ByteArrayResource, an efficient, in-memory implementation of the Resource interface, to wrap the byte array. - Create Media: It creates the final Media object using the mimeType provided in the JSON request and the newly created
ByteArrayResource. - Error Handling: The decoding process is wrapped in a
try-catchblock. This is essential for gracefully handling cases where the client might send corrupted or invalid Base64 data.
7. Testing the Application
Once the application is started, you can test each of the four endpoints using a command-line tool like cURL, or you can also test using Postman. Here are example requests for each scenario.
1. Analyze a Video from the Classpath
This endpoint uses the sample.mp4 video that we bundled inside the application’s src/main/resources/video folder.
curl -X POST http://localhost:8080/api/v1/video/analysis/from-classpath \
-H "Content-Type: application/json" \
-d '{
    "fileName": "sample.mp4",
    "prompt": "What is the main subject of this video?"
}'2. Analyze an Uploaded Video File
This endpoint accepts a standard file upload. Make sure to replace /path/to/your/videofileX.mp4 with the actual path to video files on your computer.
curl -X POST 'localhost:8080/api/v1/video/analysis/from-files?prompt=Describe the scene and any objects you can identify' \
--form 'videoFiles=@/path/to/your/videofile1.mp4' \
--form 'videoFiles=@/path/to/your/videofile2.mp4'3. Analyze a Video File from a URL
You can use any publicly accessible video URL for this endpoint. This is great for analyzing content already on the web.
curl -X POST http://localhost:8080/api/v1/video/analysis/from-urls \
-H "Content-Type: application/json" \
-d '{
  "videoUrls": ["https://some-public-cdn.com/video.mp4"],
  "prompt": "Count the number of people in this video"
}'4. Analyze a Base64-Encoded Video File
For this request, you need to provide the video data as a Base64 text string directly within the JSON payload.
Tip: On macOS or Linux, you can easily generate a Base64 string from a file and copy it to your clipboard with the command: base64 -i your_video.mp4 | pbcopy
curl -X POST http://localhost:8080/api/v1/video/analysis/from-base64 \
-H "Content-Type: application/json" \
-d '{
    "base64VideoList": [
        {
            "mimeType": "video/mp4",
            "data": "SUQzBAAAAAAAI1RTU0UAAAAPAAADTGF2ZjU4LjI5LjEwMAAAAAAAAAAAAA..."
        }
    ],
    "prompt": "Identify the color of the wall in this video"
}'Output:


8. Peeking Under the Hood – Logging HTTP Calls to the LLM
When you send an entire video file and a text prompt to an AI, have you ever wondered what that API request actually looks like? Seeing the raw data is incredibly helpful for debugging. It’s the best way to troubleshoot a prompt that isn’t giving you the results you expect or to understand exactly what information the model received.
In our project, we made this easy by using a fantastic library called Logbook. With just three simple configuration steps, we enabled detailed logging for all our AI interactions:
- We added the
logbook-spring-boot-starterdependency to our pom.xml. - We configured a
RestClientCustomizerbean in our main application class, which automatically hooks Logbook into every web call made by Spring. - We set the logging level for
org.zalando.logbook.Logbookto TRACE in ourapplication.ymlto capture the full request and response details.
With that simple setup, every conversation our ChatClient has with the AI model is automatically printed to the console for us to see.
For a more in-depth guide on this topic, you can read our detailed article: Spring AI Log Model Requests and Responses – 3 Easy Ways
👉 Sample Request Log
Here is an example of what the log looks like when we send a request. You can clearly see our system instructions, the user’s prompt (“What is the main subject of this video?”), and the video data itself (shortened for brevity) being sent to the model.
2025-08-02T01:26:54.019+05:30 TRACE 2734 --- [spring-ai-video-analysis-cookbook] [nio-8080-exec-1] org.zalando.logbook.Logbook              : {
  "origin": "local",
  "type": "request",
  "correlation": "12380c97f9cbe638",
  "protocol": "HTTP/1.1",
  "remote": "localhost",
  "method": "POST",
  "uri": "https://generativelanguage.googleapis.com/v1beta/openai/chat/completions",
  "host": "generativelanguage.googleapis.com",
  "path": "/v1beta/openai/chat/completions",
  "scheme": "https",
  "port": null,
  "headers": {..},
  "body": {
    "messages": [
      {
        "content": "You are an AI assistant that specializes in video analysis.\nYour task is to analyze the provided video file(s) and answer the user's question.\nCommon tasks are describing scenes, identifying objects, or summarizing the content.\nIf the user's prompt is not related to analyzing the video,\nrespond with the exact phrase: 'Error: I can only analyze video and answer related questions.'\n",
        "role": "system"
      },
      {
        "content": [
          {
            "type": "text",
            "text": "What is the main subject of this video?"
          },
          {
            "type": "image_url",
            "image_url": {
              "url": "data:video/mp4;base64,AAAAIGZ0eXBpc29tAAACAGXg=="
            }
          }
        ],
        "role": "user"
      }
    ],
    "model": "gemini-2.0-flash-exp",
    "stream": false,
    "temperature": 0.7
  }
}👉 Sample Response Log
Here is the corresponding response from the LLM, showing a successful status: 200, and the model’s full analysis, which is invaluable for troubleshooting.
2025-08-02T01:26:57.712+05:30 TRACE 2734 --- [spring-ai-video-analysis-cookbook] [nio-8080-exec-1] org.zalando.logbook.Logbook              : {
  "origin": "remote",
  "type": "response",
  "correlation": "12380c97f9cbe638",
  "duration": 3719,
  "protocol": "HTTP/1.1",
  "status": 200,
  "headers": {...},
  "body": {
    "choices": [
      {
        "finish_reason": "stop",
        "index": 0,
        "message": {
          "content": "The main subject of this video is a classroom setting where a teacher is lecturing students.",
          "role": "assistant"
        }
      }
    ],
    "created": 1754078217,
    "id": "CByNaMLiG5unnvgPz-a8gAU",
    "model": "gemini-2.0-flash-exp",
    "object": "chat.completion",
    "usage": {
      "completion_tokens": 17,
      "prompt_tokens": 1557,
      "total_tokens": 1574
    }
  }
}9. Video Tutorial
If you prefer visual learning, check out our step-by-step video tutorial. It walks you through this versatile Video Analysis API from scratch, demonstrating how to handle different video sources and interact with a multimodal LLM using Spring AI.
📺 Watch on YouTube:
10. Source Code
The complete source code for this Spring AI video analysis project is available on our GitHub. Just clone the repository, plug in your API key, and run it locally. It’s the best way to experiment with the code and see how all the pieces fit together.
🔗 Spring AI Video Analysis: https://github.com/BootcampToProd/spring-ai-video-analysis-cookbook
11. Things to Consider
When implementing video analysis in production environments, keep these important factors in mind:
- Cost Management: Video analysis is more expensive than image processing. Implement usage tracking and set budget alerts to prevent unexpected costs.
- File Size Limits: Videos can be very large. Consider implementing file size validation and potentially compressing videos before analysis to reduce costs and processing time.
- Processing Time: Video analysis takes longer than image. Implement proper timeout handling and consider asynchronous processing for a better user experience.
- Security Measures: Validate video file types, scan for malicious content, and implement rate limiting to prevent abuse. Be especially careful with URL-based video processing to avoid SSRF attacks.
- Memory Management: Large videos consume significant memory. Monitor application memory usage and consider implementing video streaming or chunking for very large files.
- Format Compatibility: Test with various video formats and codecs. Some models may have limitations on supported formats or maximum duration.
12. FAQs
Can I analyze multiple videos simultaneously in one request?
Yes! All endpoints except the classpath one support multiple videos. The AI will analyze all videos together and provide a comprehensive response considering all content.
How long can the videos be?
This depends on the AI model’s limitations. Most of the LLMs typically handle videos up to several minutes, but longer videos may need to be chunked or summarized differently.
Can I switch to a different AI model?
Absolutely! Spring AI’s design makes it easy to swap models. You’d change the dependency in pom.xml and update the configuration in application.yml.
Is this suitable for real-time video analysis?
Video analysis has inherent latency due to processing complexity. For real-time needs, consider breaking videos into shorter segments or implementing streaming analysis with frame sampling.
Can the AI analyze videos where the speech is in a language other than English?
Yes, most modern multimodal models like Google’s Gemini have strong multilingual capabilities. They can often auto-detect the language spoken in the video’s audio track and perform tasks like transcription or summarization in that language. It’s always a good idea to check the specific model’s documentation for a list of officially supported languages.
13. Conclusion
With Spring AI, building apps that can understand video is more achievable than ever. We’ve laid out a solid foundation that opens the door to creating powerful tools—whether for summarizing content, improving accessibility, or moderating media. The flexible design we used, which accepts multiple video formats, means your application is ready to adapt and grow, all while keeping your codebase clean and easy to maintain.
14. Learn More
Interested in learning more?
Spring AI Audio Analysis: A Developer’s Guide to Transcription and Insights
Add a Comment